A tool for placing colour, rather than a pen filled with it
The PICCASSO 799 Edge Eyeliner is a separate brush used with eyeliner. Unlike a pen that feeds ink through its own tip, it lets you choose colour, formula and the amount loaded independently. Before buying, consider whether you need only the brush or also an eye-area cosmetic and cleaning supplies. Its useful starting point is not completing a long, dark line in one pass. The slanted edge can help place short sections, adjust their position and thickness, and connect them while checking the result with the eye open.
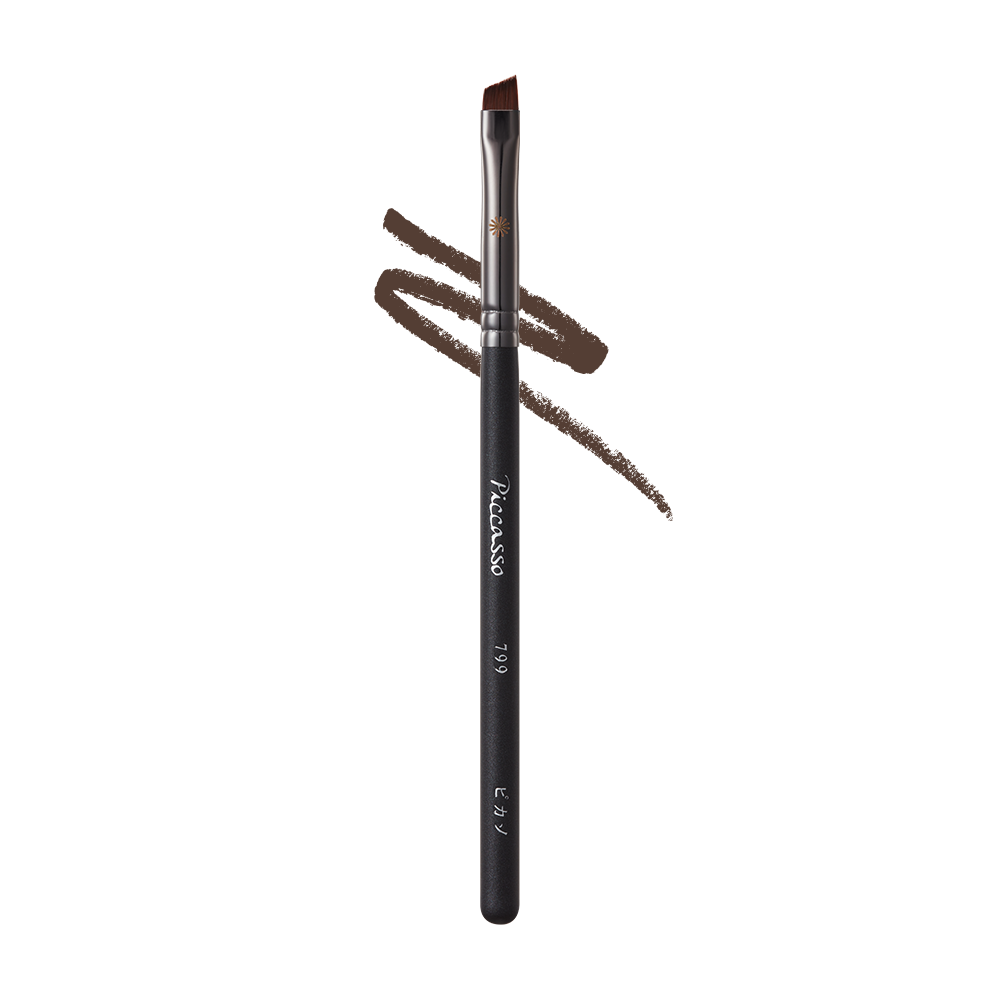
A beginner does not need to change the entire eye look at once. Start by linking a short section of the external upper lash line from the middle towards the outside, then refining the end. Someone who already uses a pot gel can compare tools while keeping the familiar colour. If your priority is uncapping one product and finishing quickly, a separate formula and brush-cleaning routine may feel cumbersome. Choose the 799 for the way you want to build a line and care for your tools, rather than for the model number alone. Brown bristles or a brown stroke in a styled picture do not mean the brush contains brown eyeliner. Switching between black and brown requires changing the cosmetic and adequately cleaning and drying away the earlier colour. A superficial wipe can leave dark pigment that mixes into a lighter shade, so check the new colour on the palette before applying it.
Distinguish the broad face from the narrow angled edge
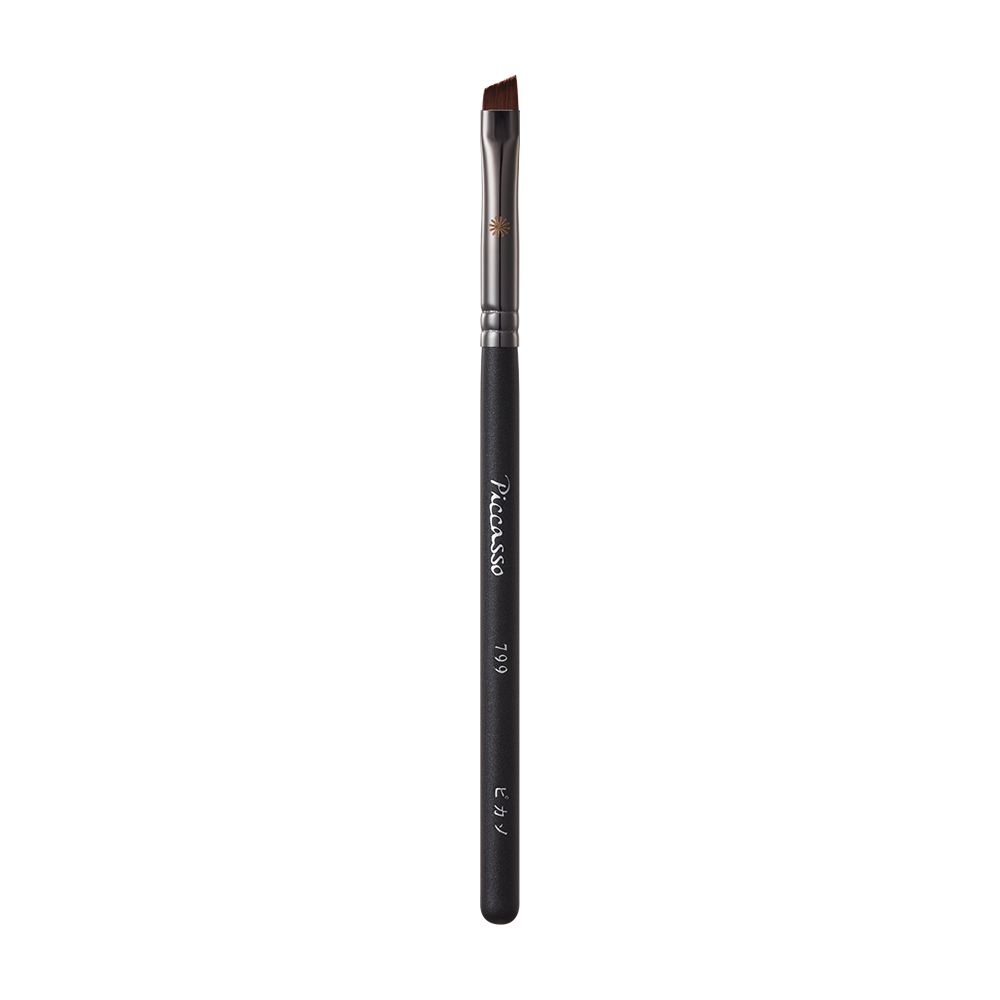
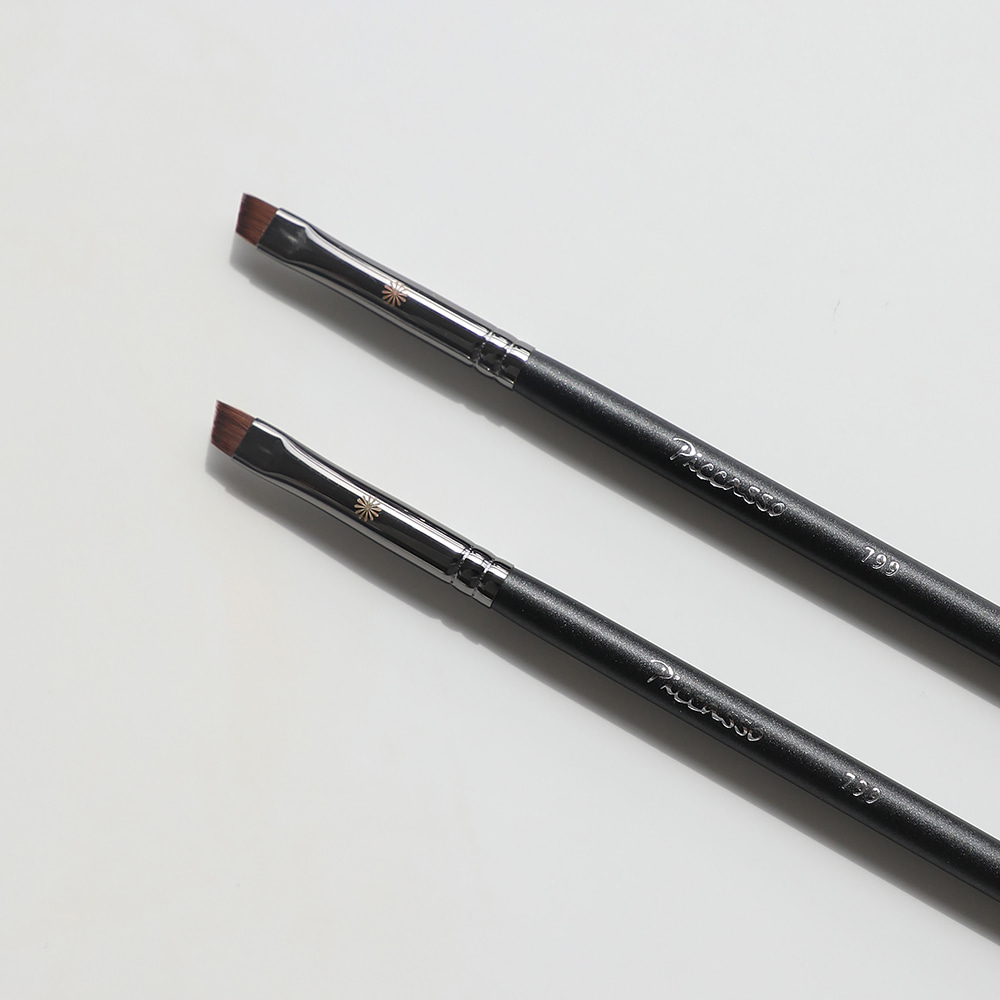
The 799’s bristles are longer on one side and shorter on the other, creating a slanted contact edge. Pressing the whole visible face onto a surface differs from touching it with the narrow edge alone. The former can deposit a broader area of colour, potentially useful when refining a small part of a wing; the latter is a starting point for connecting thin sections. Even with the handle pointing the same way, wrist rotation and pressure change the area touching the skin. First compare those effects on a clean palette before bringing the brush to the eye.
The total length is 16.2 cm. The head is 0.7 cm wide, with short and long bristle heights of 0.45 cm and 0.65 cm. A 7 mm head width is not the thickness of the finished eyeliner: the angle of the face and the pressure determine the deposited width. Check that the 16.2 cm tool fits your mirror clearance and travel pouch. Unlike a flat palette, an eyelid curves. Working in short sections and resetting the angle offers more control than trying to maintain full-width contact throughout that curve. Also compare where you hold the handle. A grip slightly closer to the ferrule can make small movements easier to observe, provided the fingers do not obscure the working area in the mirror. Holding farther back can transmit a larger movement to the tip as the wrist moves. Compare positions on the palette and find one that keeps both the bristles and reflected area visible rather than forcing a prescribed finger position.
Understand the materials and the connection between head and handle
The bristles are synthetic, the ferrule is brass and the handle is wood; the country of manufacture is China. The dark metallic appearance in photographs should not lead you to infer a different ferrule material. Knowing that black handle, metal connector and brown bristles are different components helps explain care. Assembly combines adhesive with a clamping process at the ferrule and handle. That does not mean prolonged soaking is appropriate or that the joint can never loosen. Synthetic hair is also not a promise that every user will experience no irritation.
Inspect more than the tip. Before use, look for split bristles or hardened deposits, and do not bring the brush near the eye if the connector wobbles while you hold the handle lightly. Cutting a few bristles with scissors to create a preferred slope can destroy the original aligned edge. If the head remains badly splayed after cleaning and complete drying, or the ferrule becomes loose, contact the seller about its condition instead of compensating with more pressure. The small scale of an eyeliner brush makes a stable, intact working edge especially important.
Choose an eye-area formula before trying to adapt it to the brush
Pot gel and liquid eyeliner explicitly intended to be picked up with a separate brush make it convenient to control a small amount on another surface. The word liquid does not mean every container should be opened and entered with another tool. Products designed around a built-in pen tip should be used as directed. A runny formula can collect too generously at the edge, while gel beginning to dry can leave lumps. Decant a little within the cosmetic’s instructions and assess what is actually on the bristles before the next touch.
Eye-area powder shadow can create a softer boundary, but it should not be expected to behave like a concentrated gel line. A small amount of dark matte shadow can softly define the outer section; reduce the load if powder falls away. Do not add water or setting liquid to a shadow unless its instructions allow wet use, and do not substitute a lip product around the eyes. A brush places pigment: wear and resistance to transfer depend substantially on the accompanying cosmetic, preparation and contact conditions, rather than the brush shape alone.
Stabilise the mirror and your arm first
Use a fixed mirror in good light and rest your elbow or part of your arm on a steady surface. Find enough space to see the line and move the handle without bringing your face so close that the handle hits the mirror. Looking slightly downward can expose the external upper lash line, but avoid relying on strongly stretched skin. A line that looks straight while pulled can shift with the fold when released. Alternate between the gaze used for application and the natural open-eye position in which the makeup will be seen.
Clean your hands and brush, and keep a palette and wiping supplies nearby. Check that the cosmetic is intended for the eye area and do not share the tool. This beginner routine concerns the skin outside the lashes, not the inner waterline or eyeball. Work while still, rather than walking or travelling in a moving vehicle. Stop if irritation occurs; seek medical advice if it persists. Once set up, release unnecessary shoulder and finger tension: a stable position should support small movements, not encourage a rigid grip or stronger pressure.
Control the load before it reaches the eyelid
Decant only what is needed onto a clean palette and distribute a thin amount over both faces of the tip. Pushing the whole head deeply into a pot can accumulate product near the ferrule and complicate cleaning. Lightly arrange the edge on the palette to reduce clumps, checking that a blob is not hanging from one end. Reload for short sections instead of taking a large amount to obtain darkness immediately. This keeps the area requiring correction small. Compare the mark made by the face with the mark made by the edge at this stage.
Make two or three short test strokes on the palette to see whether the current load moves evenly. If the mark breaks, distinguish insufficient product, drying formula and separated bristles before increasing force on the lid. A properly loaded edge is different from one carrying a large droplet. Do not return leftover decanted cosmetic to its original container, and limit the time the container remains open. Keeping the adjustment surface close lets you reassess the tool during application without touching or repeatedly correcting the eye area. The sequence of test marks offers clues. If only the first is thick and the next is fine, first reduce the initial load; if each splits on the same side, inspect edge alignment again. Changing shade and formula at the same time makes the cause harder to distinguish. Keep the product constant while adjusting the amount, and do not test a dry or hardened head by increasing pressure.
Connect short sections along the external upper lash line
For the first exercise, choose the section from roughly the middle of the eye towards the outer corner. Lightly touch the narrow edge to the skin immediately outside the lashes and join small marks. Attempting one long curve from the inner corner requires continuous changes in wrist position and contact angle. Dividing it into short sections lets you reset that contact each time. Do not push the bristles towards the eye or press the metal ferrule onto the skin; the working contact should remain the brush hair.
After a few small movements, move back and look with the eye open. A gap does not require widening the entire line: add a little only where it actually looks incomplete. If you want a finer inner section, approach after adjusting the load rather than immediately after collecting more product. You need not reach the innermost corner at the first attempt. Extend the area gradually once the middle and outer sections feel manageable. Learning where colour lands is more transferable to another formula or shade than simply learning how quickly to make it dark.
Set the wing direction with the eye open
The brush’s slant does not automatically decide the wing’s direction. Look straight ahead with a relaxed expression and choose where the colour should extend. Make the first guide short and faint, then see how it relates to the lid fold and lower outline. A raised wing and a short, nearly horizontal end are different choices; neither is a universal answer. Before reversing the long and short sides of the 799, test the resulting direction on the palette so that you need not twist the wrist into an uncomfortable position.
Connect the guide to the external lash line in small movements, filling the narrow space between them only if needed. A smooth shape with the eye closed may disappear into a fold when opened, so check straight ahead repeatedly. Adding colour to force a higher angle can increase both length and thickness unintentionally. If the direction is wrong, refine that end and restart short rather than extending it indefinitely. Practising only a modest outer flick is enough; a large wing is not a requirement for learning to use an angled brush.
Compare both eyes before deciding the final darkness
Establish basic length and direction on both eyes instead of finishing one completely and trying to copy it. Move back until the whole face is visible, open the eyes and check that your head is not tilted. Lid folds and lash direction may differ between sides. Comparing the apparent visual weight and end position from the front is more useful than making every mark exactly equal as a measurement on the skin. Use the close mirror for detail and a slightly more distant view for overall balance.
Once the basic direction is set, deepen only the sections that need it. Continually thickening the second eye because the first is darker can move both away from the intended fine line. Before adding, identify whether the apparent difference comes from line width, eyelid shadow or mascara on the lashes. Not every imbalance needs to be solved with eyeliner. Blink and return to a natural open-eye position for the final check, then choose a stopping point. More time spent correcting does not automatically produce a better result.
Plan a soft brown outline differently from a defined gel line
The same 799 can serve different intentions depending on colour and formula. A little eye-safe brown powder along the outer section can be used to plan a gentler boundary, while connecting a narrow gel edge is an approach to clearer definition. Do not press or repeatedly rub powder merely to force it to look as dark as gel in one pass. Stop at the effect appropriate to that formula. A thin brush does not make every cosmetic deposit at the same concentration.
Separate the causes when the result differs from your intention. If it looks too black, review the shade before changing tools; if the wing feels heavy, inspect length and thickness before blaming the entire colour. Glossy liner can also reflect light differently, so look straight ahead and from a slight angle. For your own comparison photographs, keep lighting and gaze similar to make shape changes readable. The exercise is to identify what works when your own eyes are comfortably open, rather than reproduce another person’s eye photograph exactly.
Treat blobs, broken strokes and transfer as different problems
A lump at first contact may mean too much product or an uneven load on one face. A striped or divided mark can indicate hardened product between hairs or a splayed edge. A gap partway along a stroke can come from insufficient load, drying formula or a changed contact angle. More pressure on the same spot does not solve all of them. Lift the tool, clean or reload a small amount, and check on the palette before returning to the lid. That can reduce repeated corrections on delicate skin.
If colour transfers onto the upper lid after application, consider drying time, thickness and skin contact as well as brush shape. Follow the base and liner instructions instead of aggressively drying the area or adding an arbitrary powder. Do not revive hardened cosmetic with saliva or water, or use brush cleanser and makeup remover as eyeliner thinner. If an uncomfortable feel continues after arranging the tool, stop for the day. Damaged bristles do not regain their aligned shape simply because you press harder after cleaning.
Compare the 799 with flat, round and pen-style tools
The angled 799 is worth comparing if you want to distinguish small outer directions and boundaries. PICCASSO’s 798 Flat has a short, straight shape and a different feel when placing its straight edge in brief touches. A fine round brush may depend more on wrist movement from a point. Similar model numbers do not establish identical shape or purpose. Beside a brush you already own, compare edge width, differences in hair length and how the loaded bristles gather. Identify one movement you find difficult before increasing the number of tools.
A pen combines formula and tip, simplifying preparation and transport, but differs from adjusting colour and load on an external palette. Pencil liner offers another texture and handling method; compare it by the line and routine you want, rather than treating everything as a direct substitute. For a quick morning, include preparation and cleaning in the total time. If using several pot shades, also allow cleaning and drying between colours. The 799 does not need to replace every tool in an eye-makeup routine to have a useful role.
Remove residue promptly and wash gently
Gel and liquid residue are easier to manage before hardening on a fine edge. Use a dedicated cleanser appropriate to the brush and formula; if its method requires water, rinse the bristles gently with lukewarm water. Avoid prolonged immersion of the handle and ferrule. Move lightly over the palm or cleaning surface in the direction the hairs lie. Scraping dry fragments with a nail or twisting the head against a rough surface can damage the edge while cleaning it. Several gentle rinses are different from leaving the brush soaking.
Follow the cleanser’s own rinsing and drying procedure. A quick wipe is not a guarantee that all contamination has disappeared or that disinfection is complete. Distinguish slight remaining colour from sticky deposits binding the hairs, and finish carefully so that cleanser residue does not reach the eye area. Blot moisture lightly with a clean towel and arrange the angled edge into its original shape. Including this care in the same makeup session, rather than postponing it as a large weekend task, also makes preparation for the next use simpler.
Dry with the bristles pointing down and store only when dry
Support the washed brush with the hairs directed downward so water does not collect inside the joint. Keep the tip from pressing against a floor or wall and let it air-dry. Putting a damp brush upright in a cup or forcing it into a narrow cover can leave moisture inside or bend the edge. Give it ventilation and time rather than strong heat from a hair dryer. A drying place continuously exposed to cosmetic dust is also harder to keep clean.
Once completely dry, store it where the head is not compressed. In a pouch, separate it from heavy containers and zips that could catch the tip. Wash sufficiently before travel to avoid having to pack it damp at the last moment. The product detail lists one brush cover sized to fit. Check dryness and shape before putting it on; the cover is not a sealed washing or sterilising device. When using several colours, knowing which tools retain pigment helps avoid unwanted black or brown in the next application.
Check the model and actual contents before purchase
Look for PICCASSO 799 Edge Eyeliner or the Korean 799 model name, and avoid confusing similar photographs with another flat brush. Read whether the selected offer is a brush alone or a set containing liner or cleanser. Cosmetics and mirrors in styled pictures are not automatically included. At the linked retailer, establish quantity and delivery destination, then compare sellers on the same single-brush basis. Treat additional choices such as engraving separately from the tool’s practical purpose. A photograph of two brushes side by side does not establish a two-piece set. Decide quantity from the selected option. A spare can keep colours separate while one brush dries, but both still need proper cleaning, drying space and time.
Compare the full preparation cost—brush, any required liner and cleanser, plus shipping—rather than the displayed discount alone. If you already own an eye-area pot liner, you need not buy another shade simultaneously. Handle clearance at the mirror, pouch fit and a suitable drying space can also affect satisfaction. Before first use, check hair alignment, joint and received model, contacting the seller if something is wrong. Stock and gifts can vary, so do not predict the full contents from an older image or a listing for another region.
Finish the first practice with one modest goal
Begin on a clean palette, making both a thin short stroke and a broader mark to learn the different contact areas. Next, at a stable mirror, connect only a short external lash-line section and check with the eye open. Choose one goal, such as a short flick or comparison of the two basic lengths, to avoid enlarging the line during repeated correction. Put the brush down briefly if your grip tightens. Before adding formula, see whether the edge is still aligned. A repeatable preparation sequence matters more than practice speed.
Finish shape checking, closing the container, removing residue and arranging drying as one routine. Next time, change only one of colour, load or angle to see what made the difference. A neat line comes from controlling formula amount, contact area, small connections and pauses, not forcing a particular tool harder. Use the 799’s angle within a range that suits your eyelids and hand movement. On days when a quick pen routine suits better, another tool is a valid choice; the brush’s value is handling the small line you actually want when you need it.
Reviews 1
Soft with control
The bristle is soft but there’s some firmness to it which is nice to use. Easily draw the eyeliner well.
we*****
A little closer to Korea.
Thank you for reading.