A curler that combines heat with a curved clamp
Fillimilli’s rechargeable heated eyelash curler combines a curved clamp with a silicone pad that heats up. Instead of separately warming a metal eyelash curler, you use the device’s power control, readiness indicator and moving clamp together. The main subject here is the second-generation standard rechargeable 20R. The same OLIVE YOUNG listing also presents a battery-operated version, Wide Fit 24R, third-generation Easy Curling 22R and character editions, so similar names can make their functions seem interchangeable. When choosing, start with the power type, curvature and controls attached to the model name, before considering the decorative design.
Understanding this tool is about choosing a curve and a sequence for holding the lashes, rather than applying heat for longer. The advertised C curl describes a rounded bend progressing from near the base toward the tips; it is not a promise of a particular eye shape or identical all-day staying power. Think about whether your usual curler touches only the centre or makes you twist your wrist awkwardly to reach the ends. Those details clarify the shape you need. Also consider whether waiting for preheating and using the device before mascara will fit comfortably into the order of your morning makeup.
20R, 24R and 22R describe shape, not heat levels
Within this product family, 20R, 24R and 22R distinguish the curvature of the head that follows the eye line. They are not temperature settings or battery capacities. The brand presents the standard 20R for relatively short, more pronounced eye contours, and the Wide Fit 24R for longer, gentler contours. The 22R designation belongs to the separate Easy Curling model. Rather than deciding only from the horizontal length of your eyes, consider how your previous curler contacted the centre and the two ends. Even on the same face, the position of each eye and the direction of your hand can change how the fit feels.
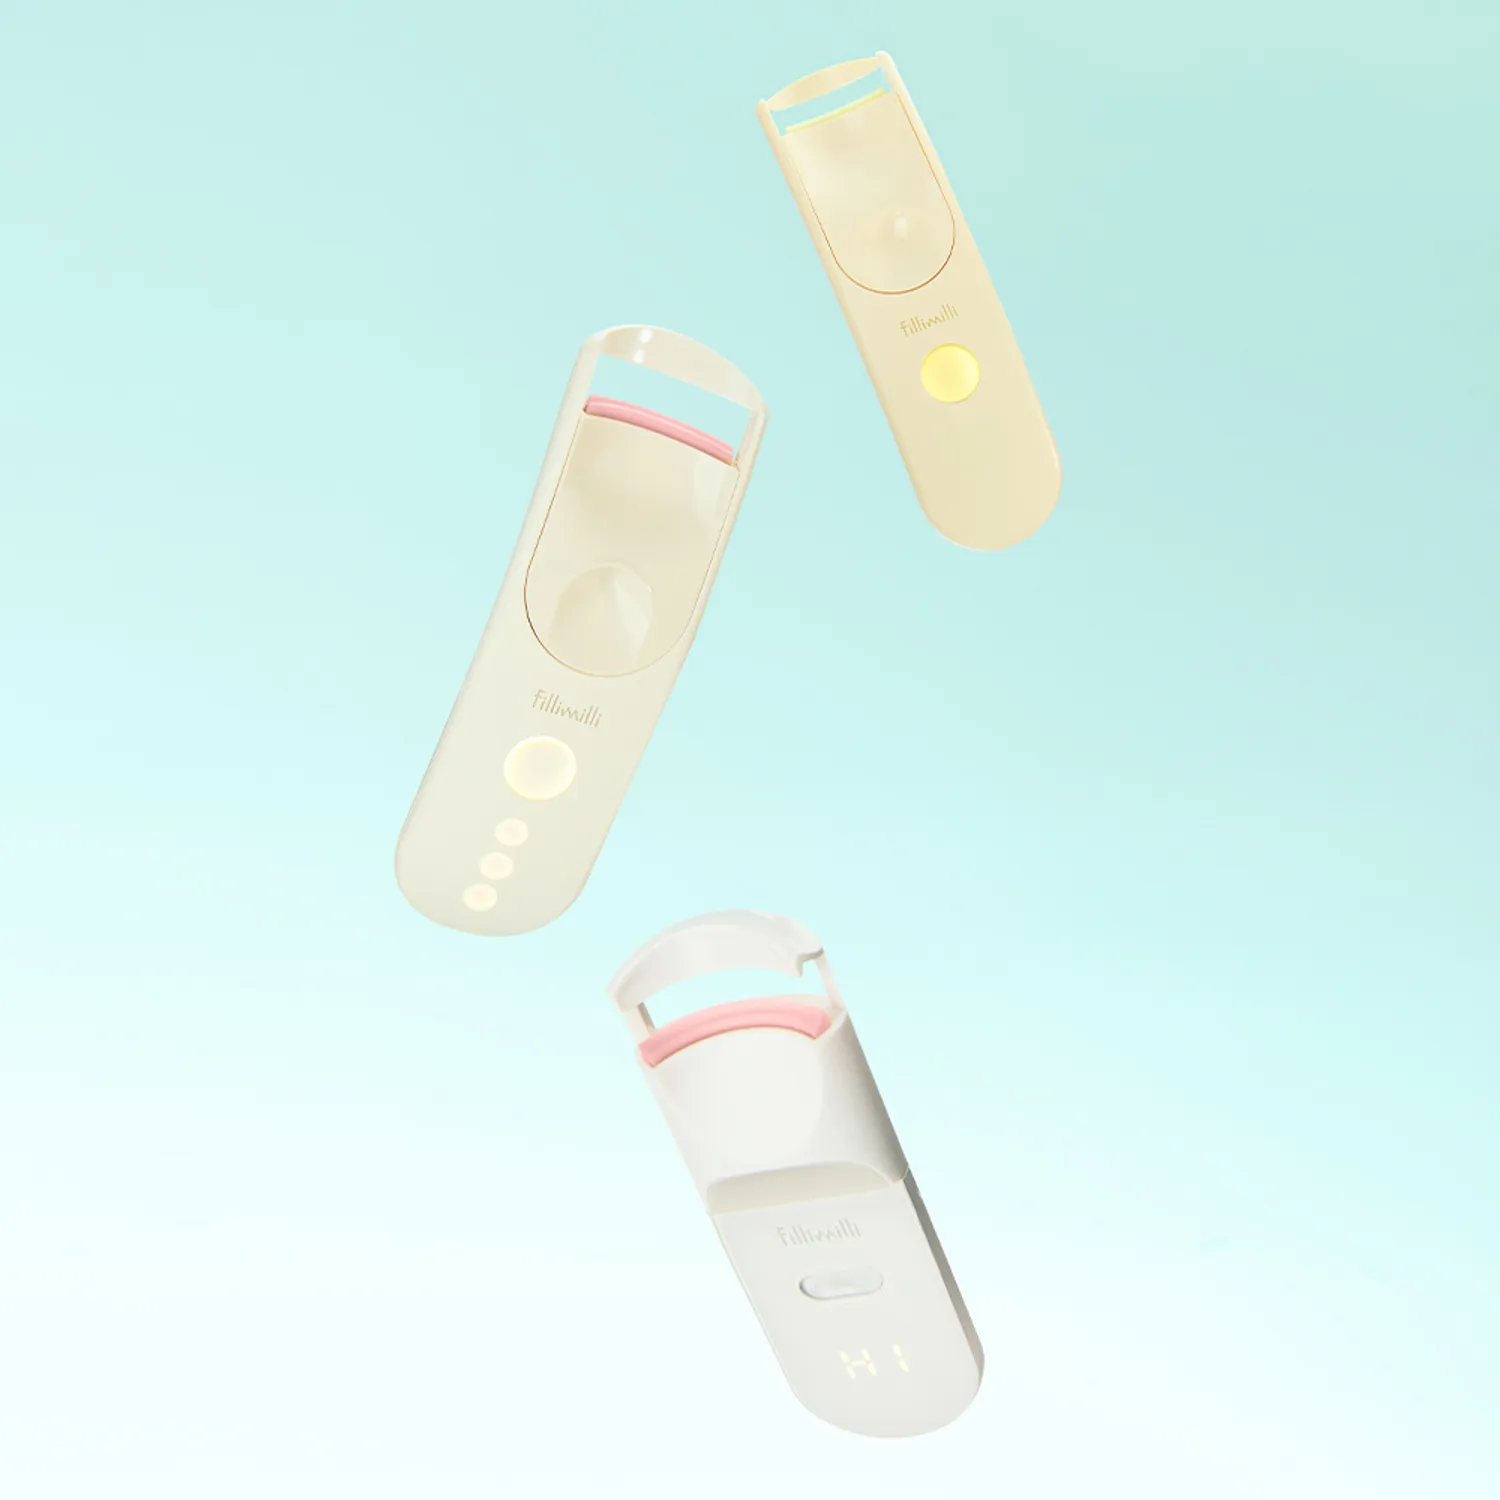
Finding an appropriate curve does not mean pushing eyelid skin into the opening to capture as many lashes as possible at once. The head should sit naturally along the eye line, without trapping the eyelid when the moving part is operated. If the centre presses first while the ends remain outside, reconsider positioning and shape instead of increasing force. A sales photograph showing three devices together does not necessarily describe a three-piece set. Checking the selected model and actual quantity also prevents you from mistaking photographs of different curvatures for different views of one identical device.
The standard rechargeable 20R: structure and specifications
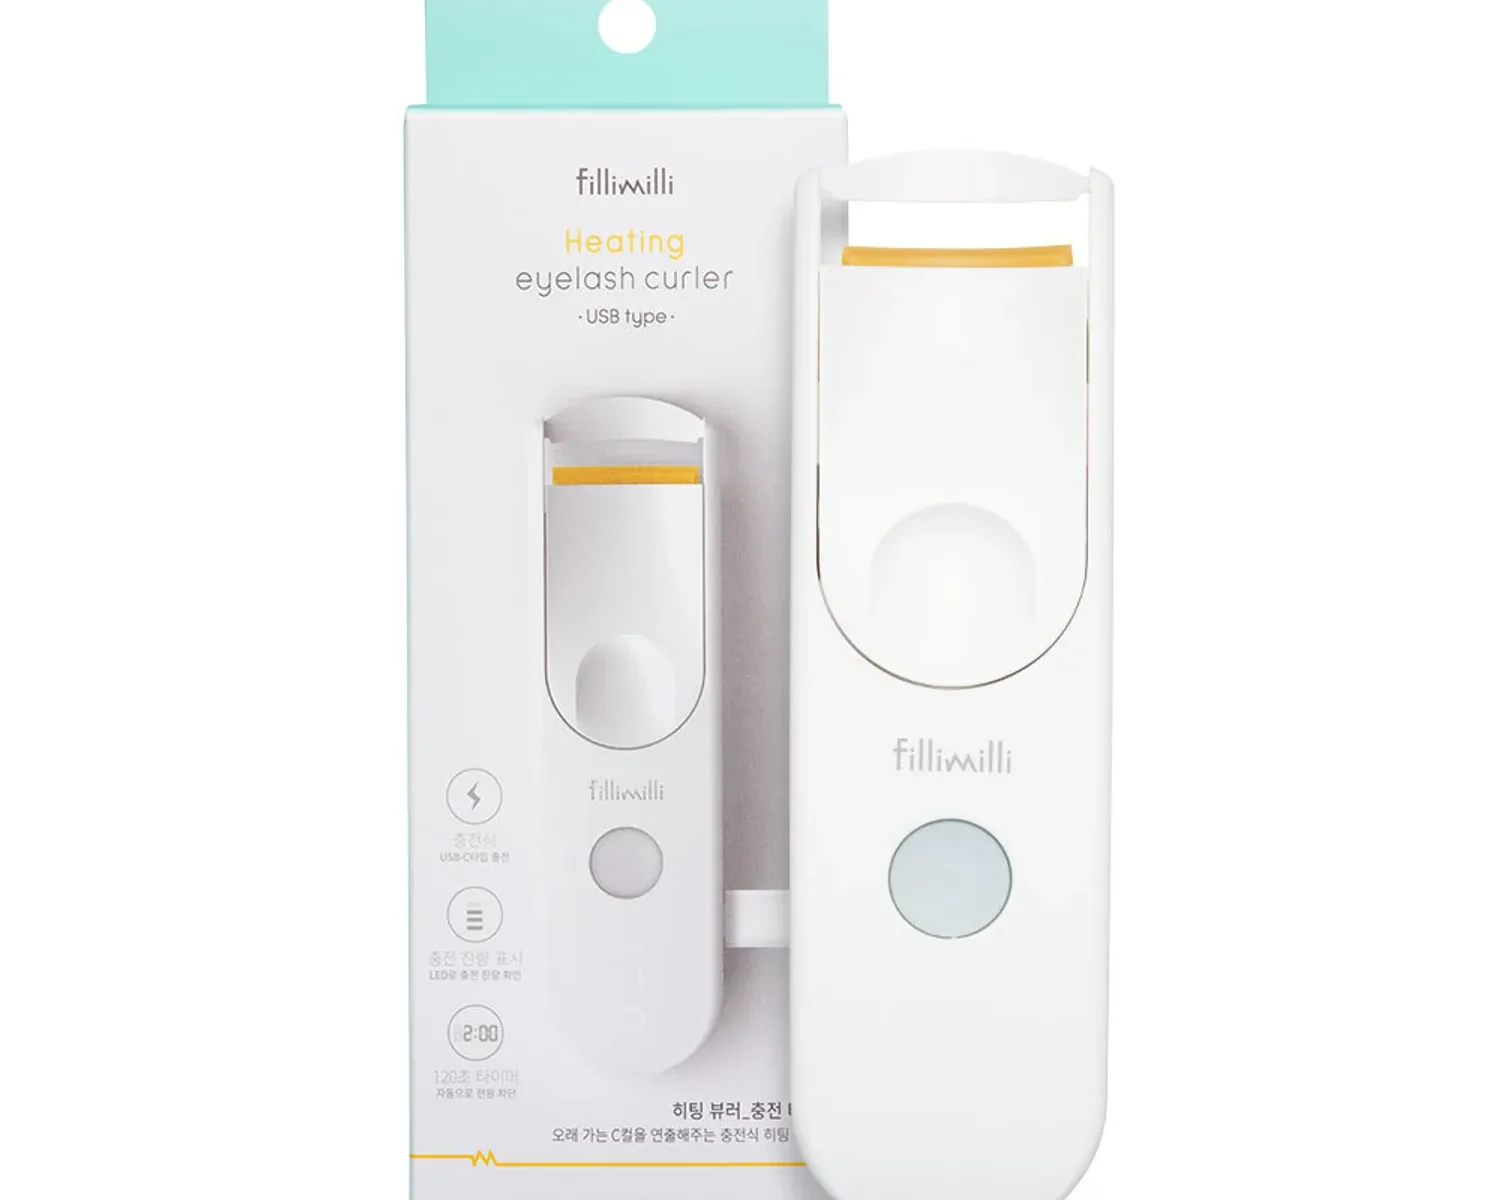
On the standard rechargeable version, the sliding section on the front moves the clamp, while the power button lower down starts preheating. Its published weight is approximately 35 g, and the listed contents are the device and a USB charging cable. The stated country of manufacture is Korea. In the main photograph, distinguishing the white body, upper pad and round power button helps separate the part your fingers move from the part that heats. Before switching on, use your own instruction leaflet to familiarize yourself with the direction in which the clamp opens and closes, so you do not have to rush the controls during use.
The lower LEDs provide charging and battery-level information. The standard model indicates remaining-power ranges using several lights, rather than giving an exact numerical percentage like a phone. In particular, the HI indication and numbers visible in 22R photographs are not the standard 20R display. Identify your model first so that you do not search for a temperature button on the standard version or interpret the absence of numbers as a fault. The silicone pad is fixed to the device. It should not be treated like the removable replacement rubber of an ordinary manual eyelash curler.
Charge with the supplied cable and an appropriate power source
Before first use, check the supplied USB-C cable, the device’s charging port and the power requirements specified for your unit. A USB-C-shaped connector is not a reason to apply every phone fast-charging arrangement to this tool. The sales instructions prohibit fast charging and emphasize using the dedicated cable provided. Keeping that cable with the device, rather than mixing it into a travel pouch full of similar leads, reduces the inconvenience of searching for the right one in the morning. If the port or cable is damaged, stop instead of repeatedly trying the connection as a solution.
Do not operate the curler while it is charging. Finish charging, disconnect the cable and make space to move in front of the mirror before using it. Checking the charge the night before, or before your makeup preparation, can prevent a low-battery situation in which you finish one eye and hurry through the other. Plan around the actual indicator rather than assuming a fixed number of charging hours or uses per charge. A clean, dry, stable surface is a more suitable charging location than the edge of a basin where splashes can reach the device. Separating charging from application keeps the working area simpler too.
Prepare dry lashes and a steady mirror first
Before turning the device on, inspect your hands, lashes and the pad surface. Begin without mascara on the lashes, and without water from washing or residue that leaves them wet. Remove any remaining makeup from the previous day first. Position the mirror so that your view and the direction of your hands stay steady, rather than holding it and continually changing its angle. Move hair away from the path along which you will bring the curler toward your eye. Switching on after these preparations lets you spend the short operating period on the actual movement instead of using it up while arranging everything else.
If your viewing angle shows only the tips, obtain a clearer view of the lashes and skin instead of pushing inward to search for the roots. Do not force the session on a day when your eyes feel uncomfortable or repeated blinking makes positioning difficult. This is a heating device used close to the eyes, so its heated part must not directly touch skin, the eye’s mucous membrane or the eyeball. Read the precautions first, and do not use it after applying artificial lashes or undergoing artificial-lash procedures. Follow the product’s warning that heat may deform the artificial material.
The white readiness pad matters more than counting 30 seconds
For the standard 20R, the instructions say to press and hold the power button, then preheat until the silicone pad turns white. The quoted preparation time is about 30 seconds. Do not skip the indicator merely because you have counted that interval; check the actual pad on your device. Do not test readiness by pressing the hot part against a finger or eyelid. This step also needs to remain distinct from the readiness colour of other models. Mixing the light-pink change described for Wide Fit and 22R with the standard 20R’s white indicator makes readiness harder, rather than easier, to judge.
The standard model switches off after 120 seconds of operation. That does not mean holding one spot for 120 seconds, nor does it mean rushing both eyes to beat a deadline. Treat it as a function managing the device’s operating period, which includes preparation and handling. Automatic switch-off does not make the heating surface instantly cold, so remember that residual heat can remain. If readiness seems unusual or the indicators behave differently, turn the unit off and consult its charging and status instructions instead of repeatedly switching it on and bringing it back toward the eye.
Position the head around lashes, not eyelid skin
With the clamp sufficiently open, look at where the lashes enter. Once the device is near the eye, confirm that lashes are what will be held, rather than trying to press the hot pad against the skin at their roots. Instructions describing application from the roots do not mean heating the skin or mucous membrane. If the eyelid folds into the opening or feels pulled, stop, open fully and position the device again. Looking at the centre and both ends in a fixed mirror also makes it easier to see which way the head tilts as you change the angle of your hand.
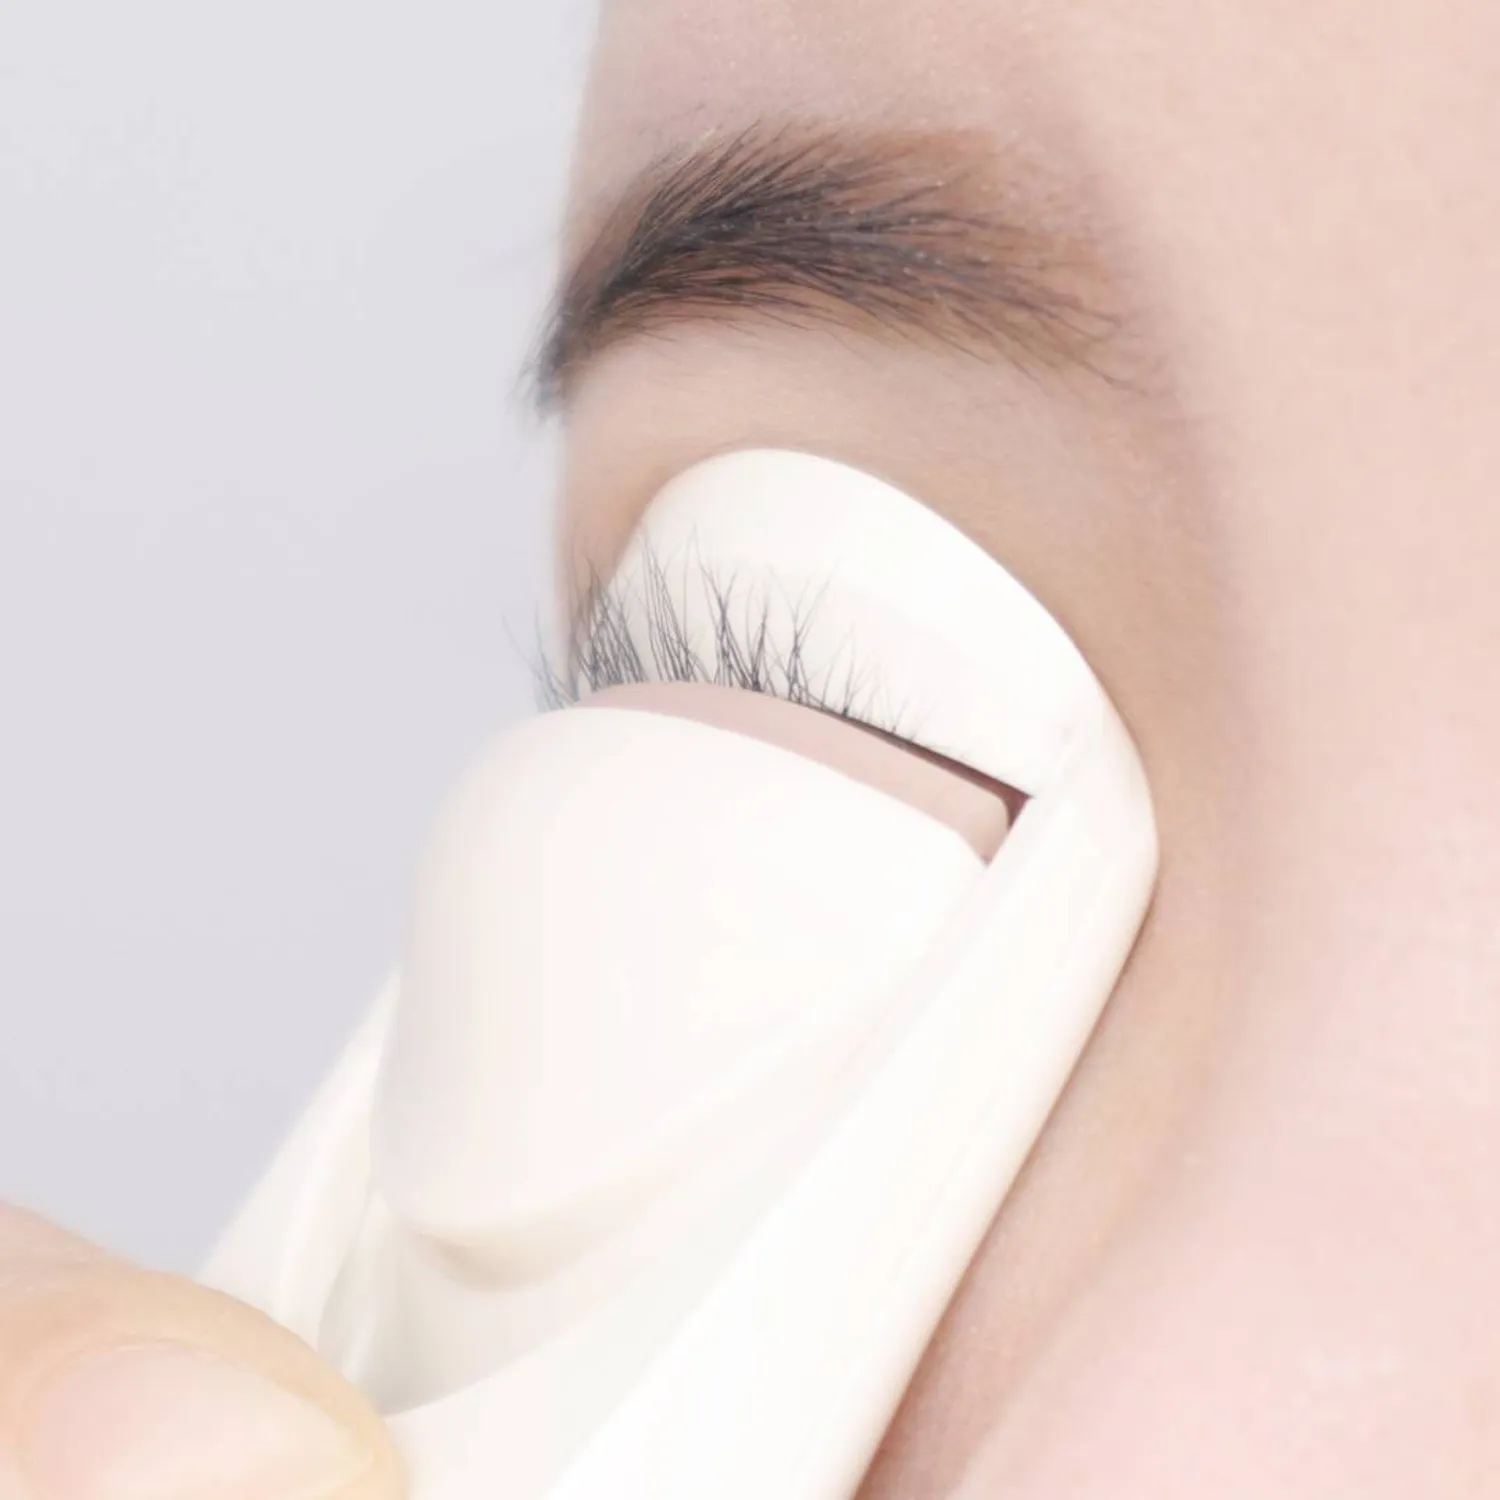
It helps to separate placing the head from closing the clamp, instead of combining both into one large push. Check the position, then move the sliding control gently. If lashes near the outer corner appear to be missing, suddenly twisting the body can pull the lashes already inside. Fully release the clamp and lift the device away before aligning it again. The application photograph in this article demonstrates the Wide Fit model. Rather than trying to reproduce the photographed angle exactly on your own eye, first assess the space between your eyelid and the head and keep the heated surface clear of skin.
Work in sections from near the base toward the tips
The standard model’s directions describe dividing the lashes into roughly three sections, working from near the base toward the tips. Think of connecting a rounded shape as you change positions, rather than creating one sharp bend with a strong squeeze. Operate gently at the first position, open completely, visually confirm the next position and then close again. Do not pull outward with the clamp still closed around the lashes. If your lashes are too short to divide comfortably into three sections, do not push closer to the skin simply to satisfy a number. The instruction is a guide to progression, not a reason to sacrifice comfortable positioning.
Your hand approaches the two eyes from different directions, so a seemingly identical movement can catch a different portion of the lashes. After finishing one side, look again at the alignment of the open head and the lashes instead of forcing the same angle onto the other side. Avoid holding one place for a long time or continually raising pressure because the curl seems insufficient. Work gently within the movements described for the product and check the result along the way. Stop immediately if you experience pain, excessive heat or any abnormal sensation around the eye; completing the curl is not a reason to tolerate discomfort.
Apply mascara after finishing with the curler
The basic order for this product is to use the curler on clean lashes, switch it off and then apply mascara. Do not reverse that sequence by taking lashes already hardened with mascara back into the heated clamp. Even if the curl seems to have fallen by evening, immediately using this device over existing mascara does not follow its directions. Photographs and reviews may show other people’s routines, but the sequence specified for your own product remains the reference. If you habitually pick up mascara first, changing where the two items sit on your dressing table can make the intended order easier to remember.
Release the lashes completely and move the device away, then press and hold the power button to switch it off. Set it down so the hot part cannot contact another tool or the lining of a pouch, and allow the heat to dissipate. When applying mascara afterwards, adjust separation and quantity as a distinct step. Separating the process of forming a curve from adding colour and volume makes the result easier to assess. How well the look lasts can vary with lash direction and length, the mascara used and the environment, so do not turn a before-and-after photograph into a promise of identical results for your own day.
A useful order for checking an uneven result
If the centre is caught but the ends remain outside, examine alignment and curvature first. When trying to capture one end causes the opposite side to trap skin, pressing harder is not the appropriate direction. Re-establish space for the lashes and decide whether the shape fits without strain. If the overall curl seems weak instead, check the readiness indicator, battery level, dryness of the lashes and cosmetic residue in turn. Treating these as separate possible causes, rather than assuming every issue is insufficient hand pressure, reduces unnecessary repetition of the same movement and makes the next decision clearer.
If the mechanism will not move or the pad is lifting, do not force it into position by pushing or pulling with your fingers. Similarly, when charging fails, check the supplied cable, permitted power source and port condition before trying a succession of other fast chargers. Stop immediately if unusual heat or eye discomfort develops and seek the assistance described in the product instructions. If an angle that normally worked suddenly becomes difficult, noting the use and charge conditions can help when contacting support. Distinguishing dissatisfaction with the curl from a problem with the device itself is a practical way to decide what to do next.
Wide Fit 24R changes width and curvature
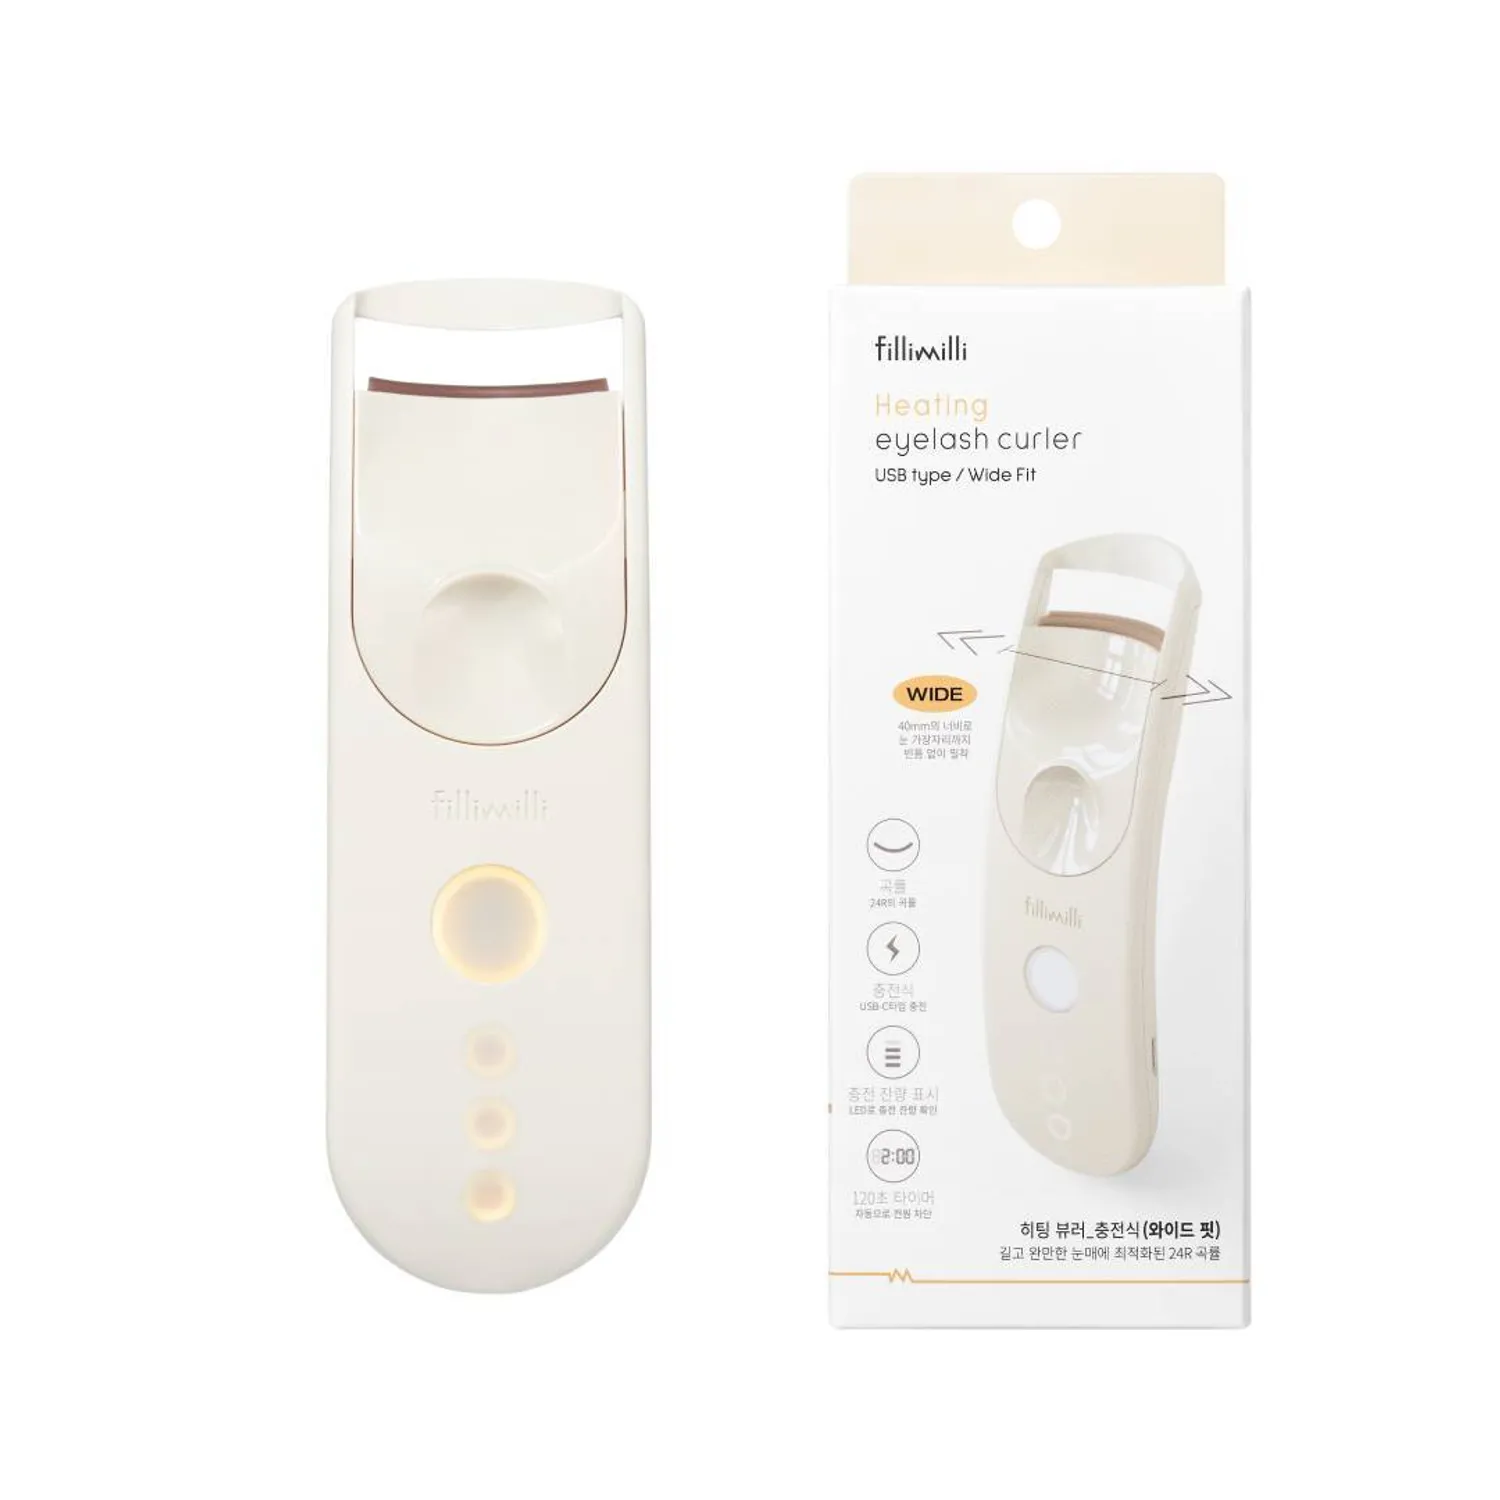
Wide Fit is presented with a 24R curvature and a broad 40 mm width, aimed at longer, gentler eye contours. Do not assume it has the same head as the standard version simply because both are rechargeable. Its photographed packaging also identifies Wide Fit and the extra width. Separate design information describes a 12 mm opening and a deeper groove, so compare the space in which the head opens and the way the fingers operate it as well. A wider device is not automatically a better fit for every eye; use the areas your usual curler misses and the way its curve sits as the starting points.
The 24R is also described as approximately 35 g, with USB-C charging, about 30 seconds of preheating and automatic switch-off after 120 seconds. Its instructions describe a light-pink readiness change in the pad, distinct from the white indicator of the standard 20R. The close application photograph in this article shows this Wide Fit. Even though the head appears broad, pressing into the eye is not the objective, and the heated part must stay clear of skin and the eye. Check that Wide Fit is the selected option and that the received box and device match, then follow that model’s leaflet for operation.
Easy Curling 22R has separate temperature controls
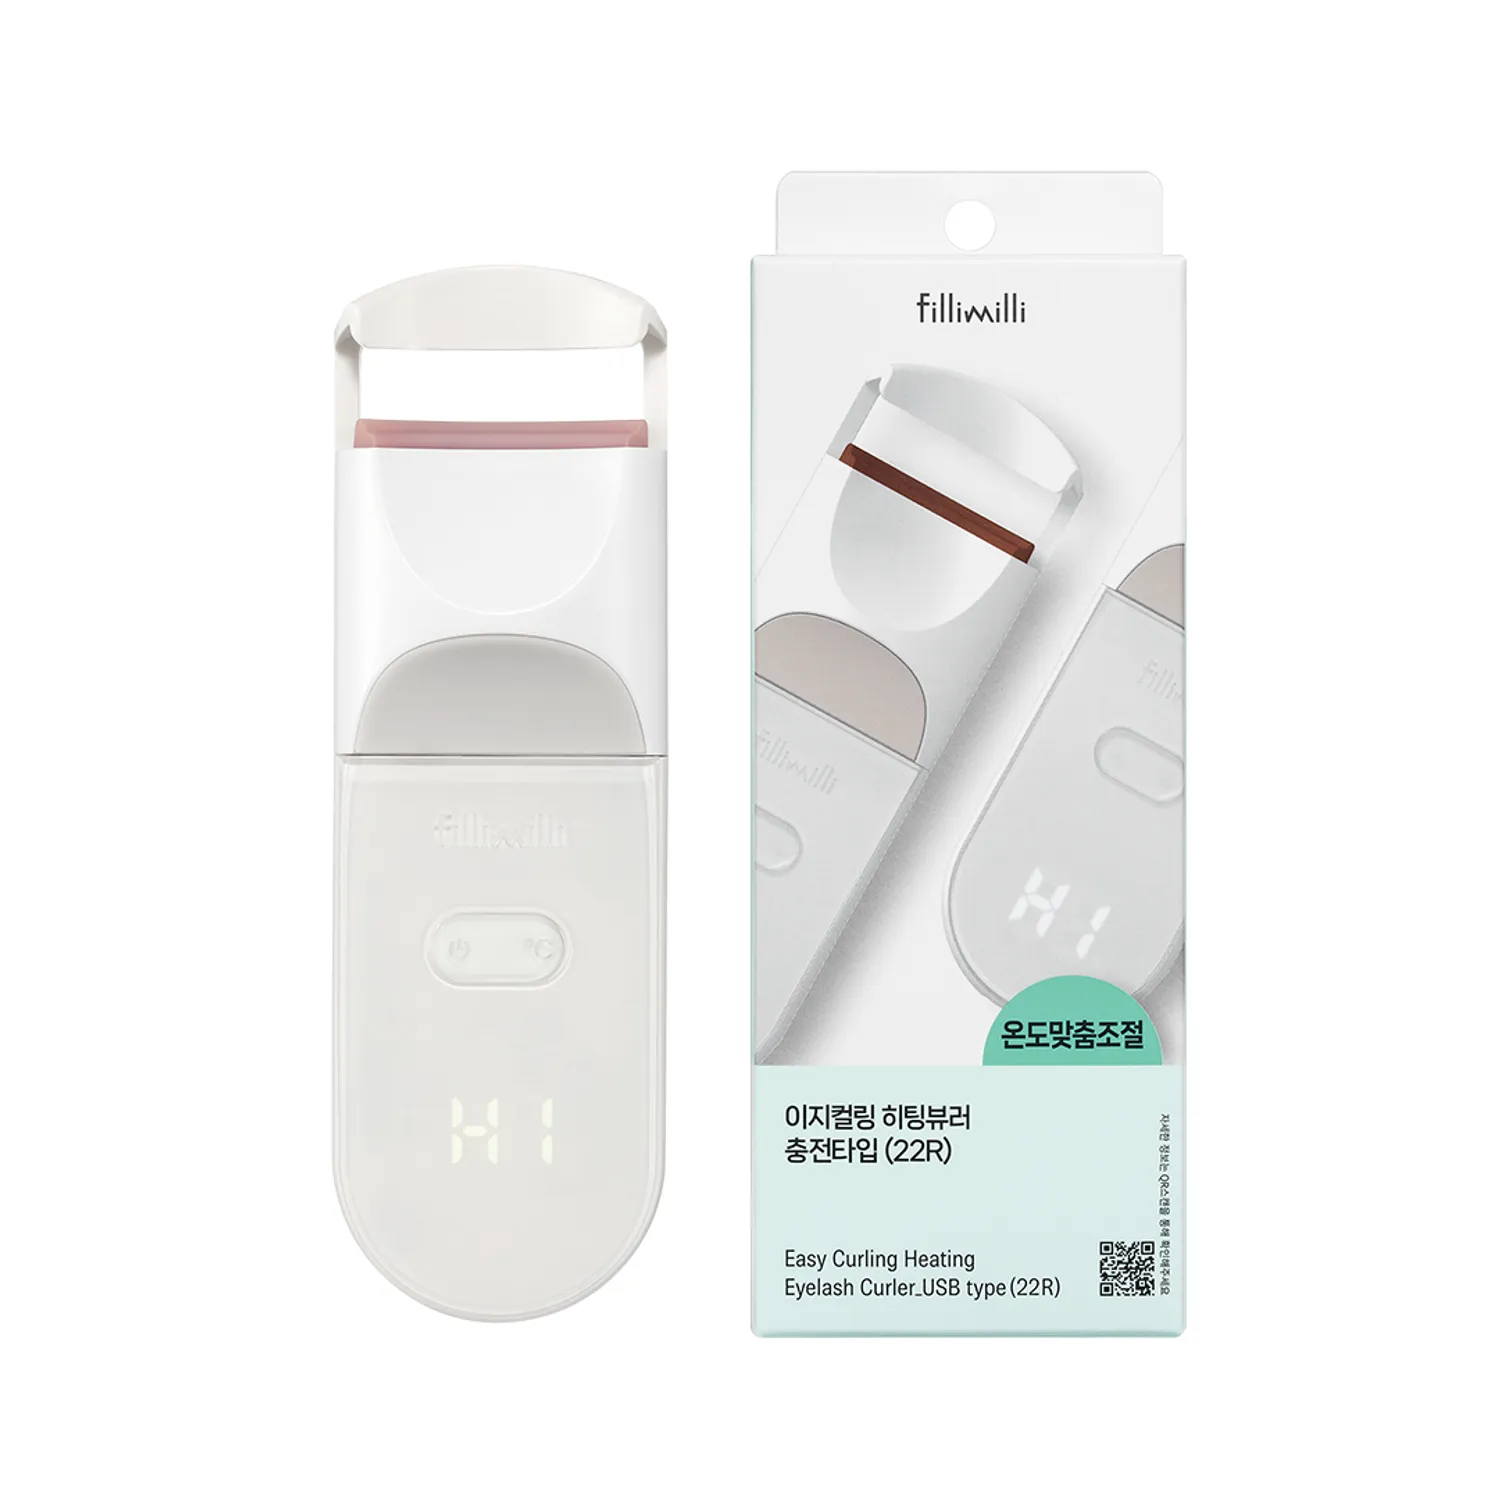
The third-generation Easy Curling 22R is a temperature-adjustable model distinct from the standard 20R. Its listed head length is 32 mm, and its design includes an open-sided frame, silicone handle and rear finger rest. The advertised lower LO setting is approximately 70±5°C and the higher HI setting approximately 90±5°C. These figures describe device settings, not temperatures that are safe for direct skin contact. The model offers choices for different lash types, including finer and thicker lashes, but a higher setting should not be treated as an automatic route to a better result. Follow the instructions specific to this version.
On 22R, press and hold the left power button to switch on; the initial setting is HI. A brief press of the right temperature button changes the setting. The listed preheating times are about 35 seconds for HI and about 20 seconds for LO, with the pad changing fully to light pink. Briefly pressing the power button during use to view a numerical battery level is also part of this model’s instructions. That explains the HI display and separate control areas in the photograph. Check the generation before purchase, and if choosing 22R, read its own precautions, including the direction to remove contact lenses before use.
Let it cool, then clean with a dry cloth
After use, switch off and allow the device to cool fully, then gently remove residue from the body and pad with a soft, dry cloth. Do not wash the whole electrical device in a basin or immerse it in water. Keep moisture out of the charging port, and avoid wiping with volatile solvents. If eye makeup has transferred to the outside, check its condition before the next use. Keeping the tool in an accessible place for care makes it easier to notice residue and begin with a clean surface, instead of leaving the inspection until the device is already warm and close to your eye.
The silicone pad is a fixed component. Do not pull at its edges to detach it for more thorough cleaning, or try to replace it with rubber from another eyelash curler. If it is damaged or lifting, contact the seller or the service channel listed with the product. Do not insert a sharp object into the slide groove to dismantle the mechanism or correct its movement. The charging cable must also stay out of water, and should not be wound so tightly that it bends sharply next to the connector. Caring for the body and cable together helps distinguish ordinary surface cleaning from a condition that needs service.
Packing and travelling with the device
At approximately 35 g, the standard rechargeable version limits weight, but the cooling and storage sequence matters as much as weight when travelling. Do not push it among other cosmetics while hot immediately after morning use. Switch off, allow it to cool and then place it in a separate space. Prevent hard objects in the pouch from pressing the sliding section, and keep the charging cable with it. Avoid leaving it in direct sunlight inside a car or in a very hot or humid location. In accommodation, a dry surface away from a basin edge reduces the chance of a fall and provides a consistent place for preparation and charging.
Having somewhere to charge is different from operating a tool next to the eye in a moving vehicle. Use it in a steady location with the mirror and your hands settled. Unfamiliar lighting or a small travel mirror can make the head’s position harder to see, so do not rush the first attempt in a new setting. For international travel, separately check the power requirements and your carrier’s rules for rechargeable devices. Do not assume that every transport operator applies the same rules. Keeping the leaflet and cable together also lets you find the exact model and power information when you need it.
Choose the actual option and check what is included
Before buying, decide whether you want standard rechargeable 20R, Wide Fit 24R or Easy Curling 22R, then examine the option selector. Rechargeable and replaceable-battery versions may have similar outlines, but preparing their power supply is different. Character editions make it easy to notice the artwork first, so read the model and contents together. Artificial lashes or other gifts shown in another buyer’s review are not automatically part of the single-item option you have chosen. Comparing the actual selected contents and checkout amount is more useful than relying on the lowest starting price displayed at the top of the product page.
When the order arrives, check the model on the box, body condition, fixed pad and supplied cable before use. Keep the instructions and warranty papers, and read the exchange and service terms that apply through your seller. For an overseas purchase, separately verify whether Korean domestic service arrangements apply in the destination country. Return conditions may change after use, so inspect contents and damage first. When recording the product name, write something specific such as rechargeable 20R rather than simply Fillimilli curler. That detail helps avoid confusion with another generation when asking about a cable or an operating issue.
A straightforward place in the morning routine
A practical sequence is to check the charge, prepare clean and dry lashes, arrange the mirror and your hands, switch on, confirm the standard model’s white readiness pad, curl gently in sections, switch off and then apply mascara. At first, learning one movement at a time may be easier than trying to preheat while simultaneously doing other makeup. Even after becoming familiar with the device, keep releasing the lashes before repositioning and actively switching off after use as basic habits. Automatic shut-off should not replace your final check before placing the tool down to cool.
Suitability is not determined by the presence of heat alone. Consider whether the curvature fits, whether your fingers can operate the slide comfortably, whether you can keep the step before mascara, and whether charging and dry storage suit your routine. Someone who applies only a quick coat of mascara may need a different tool from someone who first arranges the curve carefully. Understanding the standard 20R’s simpler controls, the broader 24R shape and the temperature choices of 22R makes it easier to choose around your eyes and sequence, rather than assuming that the model with the most functions is always the right one.
Reviews 1
22R curling
Public purchase review summary
I liked the 22R’s curling effect, but noticed eyeshadow transferring onto it.
A little closer to Korea.
Thank you for reading.