A brush for choosing where the light goes
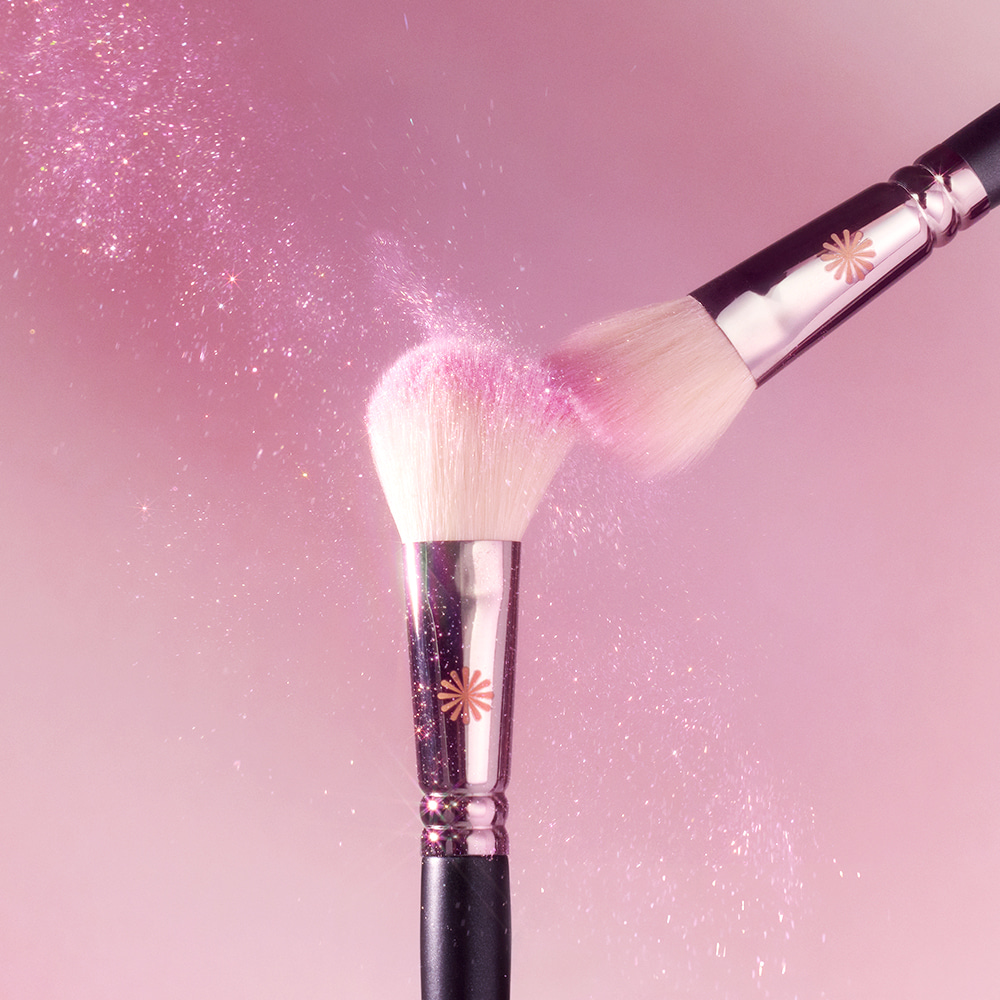
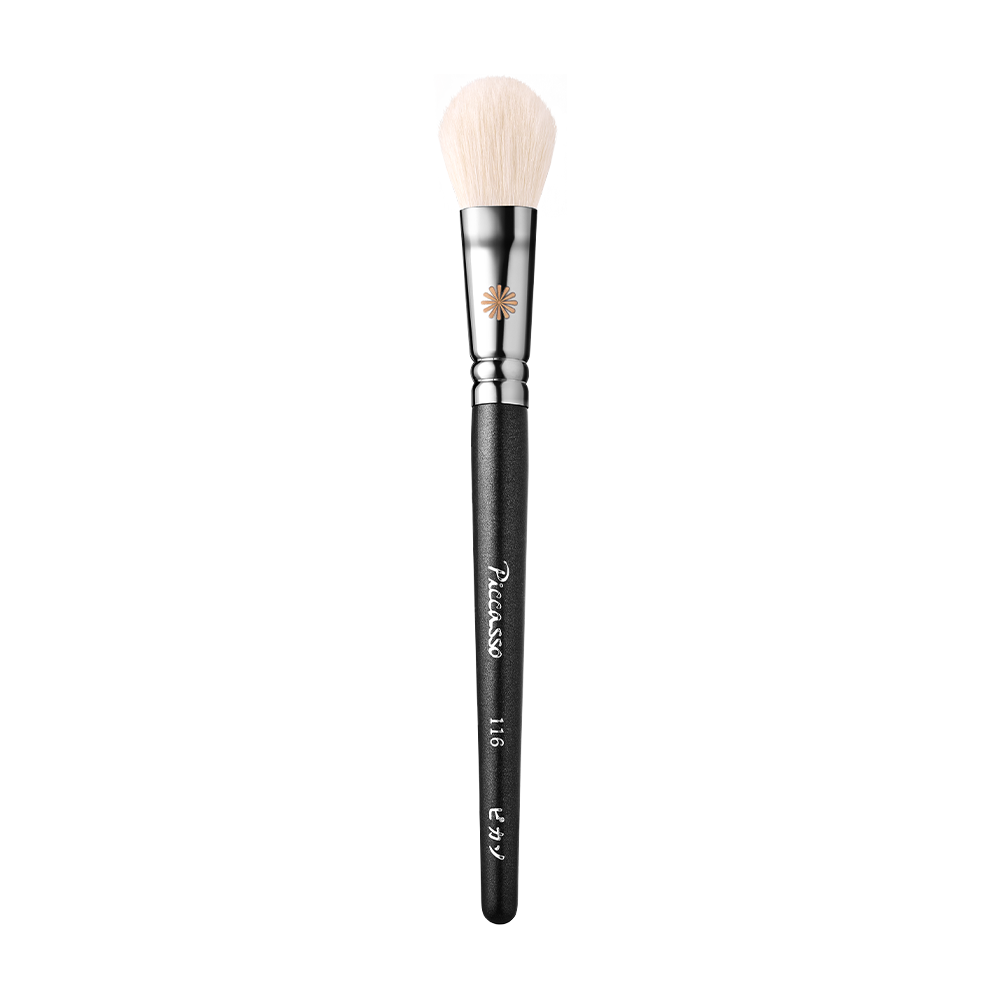
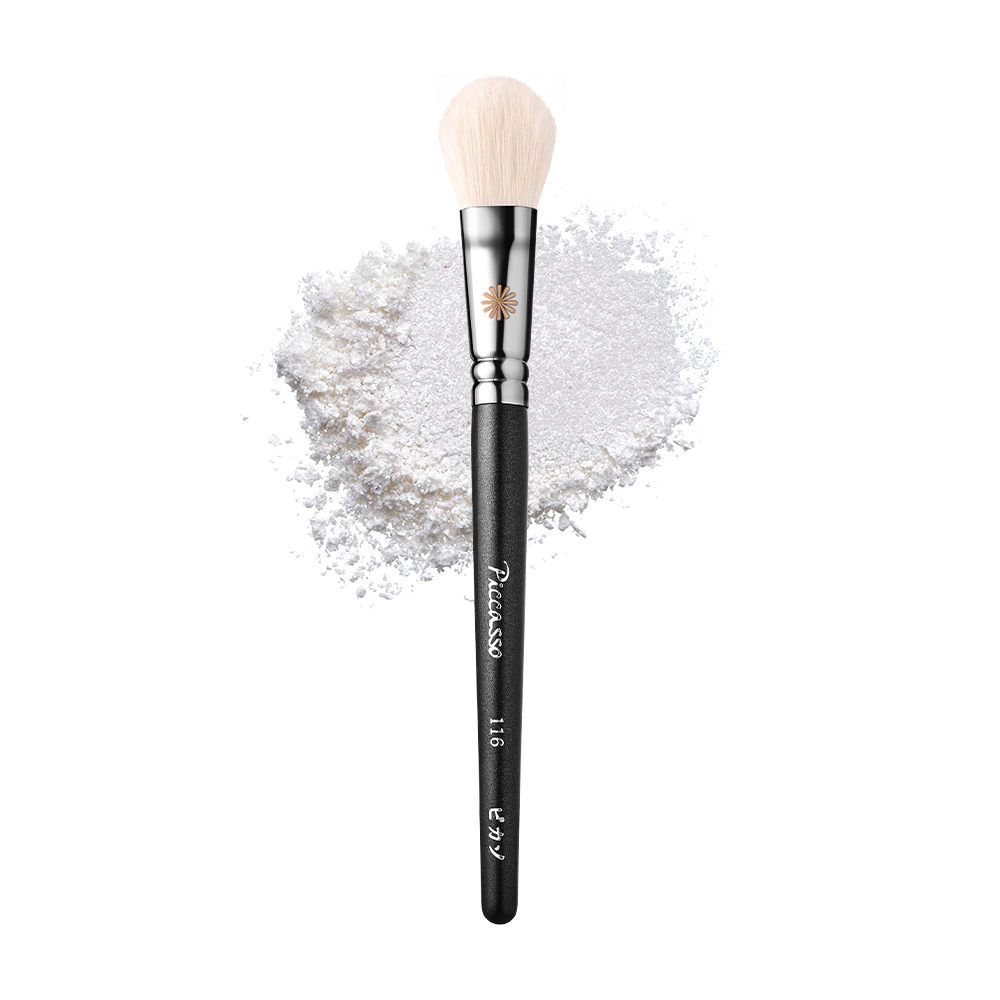
PICCASSO 116 is a makeup brush for applying highlighter powder, rather than the highlighting cosmetic itself. Its Korean product name is 116 Volume Creation Highlighter; the international listing calls it PICCASSO 116 Highlighter Brush. A rounded tip and broad working surface allow it to sweep a larger area such as the cheekbone, while a smaller part of the tip can handle more localized accents. It is presented primarily for powder highlighter and also for blush. Its role becomes clearer when you divide the face into places where you want extra reflection and places you would prefer to leave as they are, instead of making everything equally shiny.
A natural-looking result does not come from the brush alone. The highlighter’s underlying colour and reflective particles, the base beneath it, the area of bristles touching the skin and the amount loaded all contribute. Using the same 116 to spread a subtle powder widely will look different from layering a metallic formula within a narrow area. Start with a small amount on one part of the cheekbone, then turn your face in the mirror. There is no need to highlight the nose, forehead and chin immediately. Leaving room to decide which other areas would benefit is a useful starting point for this brush.
Use the rounded head as a broad face or a smaller tip
The end of the 116 forms a gentle curve rather than a fine, pointed dot. The brand describes evenly layered bristles and a rounded highlighter shape inspired by its Signature 1106. The 1106 and 116 are different model numbers, so check them separately when shopping. Angling the broad face against the skin creates a larger contact area; holding it so that only part of the tip touches reduces that area. Instead of keeping the brush at one fixed angle, change the contact surface to suit the width you need. Trying the shape against the back of your hand makes it easier to see how much the bristles spread at different angles.
A thin fan brush uses a long edge, while a very small detail brush makes it easier to select a tiny spot. The 116 sits closer to a choice that can work across the cheek and then add localized emphasis. If you want only a rice-grain-sized point on the nose, using a tiny part of the tip or choosing a smaller tool is simpler. A larger head does not necessarily apply more intense colour, but pressing its whole surface onto a narrow area can spread the product farther than expected. Decide what shape of reflection you want first, then match the working width to it.
What the 19-centimetre length and goat hair mean
Published dimensions are 19 cm overall, with a bristle width of 2.3 cm and bristle length of 3.1 cm. Allow more storage space than for a folding miniature travel brush, and move a close mirror far enough away that the handle does not strike it. The listed materials are goat hair for the bristles, brass for the ferrule and wood for the handle. Distinguishing the pale hair, shiny connecting sleeve and dark handle also helps explain which part to wash and which parts should not sit in water. Anyone avoiding animal-derived hair can make that decision from the material listing. The specification labels the country of origin as China, with the handle and assembly country separately listed as Korea.
The ferrule connects the bristles to the handle. Product information describes adhesive followed by pressure-assisted assembly to reinforce that connection. For care, it is useful to understand this as an assembled brush with distinct components rather than a solid waterproof tool. Avoid twisting the handle or soaking the joint, and inspect it if movement develops during use. Nor do the head measurements create one fixed application area on the face. Pressure changes the area of contact even when the nominal width stays the same. Use the footprint made by a light touch as your starting point instead of pressing the head flat to match a measurement.
Pair it with powder highlighter first
Because the 116 is presented for applying powder particles, a familiar pressed-powder highlighter is a straightforward first pairing. A softly pressed product may load enough with only a light sweep over the surface. A harder surface can release a different amount with the same number of passes. Before rubbing more vigorously, look at how much powder has actually reached the tips. For loose highlighter, placing a small amount in a clean lid or on a palette gives the head a controlled surface to touch. This makes the amount easier to manage than pushing the brush deep into the original container, where more of the bristles can pick up product.
Cream and liquid highlighters move differently from powders. If your usual product is a sticky balm or a liquid, prioritize a tool intended for that texture. There is no need to treat misting the 116 or saturating it with cosmetic liquid as its standard method of use. Large reflective particles can remain visibly sparkly even when dispersed thinly, while a finely luminous formula may brighten a broader surface. Rather than attributing every difference in finish to the tool, start by matching the cosmetic to the kind of light you want. The brush can help distribute a formula, but the formula still supplies its colour and type of reflection.
Begin with a base that stays in place
When foundation or cushion makeup is still very wet, highlighter powder can collect at the first point of contact. Let the base settle before starting and, if necessary, lightly tidy the surrounding area with your usual face powder. There is no need to cover the whole face with a thick matte layer. The purpose is to maintain your preferred base finish while creating a surface over which the brush can move without dragging the makeup underneath. Where concealer has been layered over the upper cheek, begin with brief touches and lifts rather than repeatedly rubbing along the same section.
Gripping tightly just below the ferrule may feel precise, but it can also encourage more pressure. Begin with a comfortable hold around the middle of the handle, leaving the wrist free to move, and avoid spreading the bristles sideways against the face. Keep the mirror far enough away for the end of the handle to clear it. A close magnifying mirror shows individual particles and may tempt you to keep adding, so also check from a distance that includes the whole face. Settling both your base and your posture first reduces the number of things you need to adjust while judging the powder amount.
Judge the amount you load by looking at it
Before touching the highlighter, check that the brush is fully dry and does not carry the previous colour. Begin by bringing just the tip, or part of the broader surface, lightly against the product. You can gauge the load on the back of your hand or a clean palette, and gently shake off excess instead of striking the handle hard against the container. There is no need to blow powder away with your mouth. The important principle is a small first deposit on the face, rather than an exact rule about the number of times to sweep the pan. Surface hardness and pigmentation differ between highlighters.
The first contact after loading can deposit relatively more powder, so place it where you want the brightest area. Then move toward the surrounding skin without picking up fresh product. If the outer, raised part of the cheekbone is your chosen centre, begin with a short movement there and adjust the spread in the direction you prefer. Do not finish one side and assume the remaining load will provide an equivalent start on the other. Prepare a comparable small amount for each side. Applying once and looking is easier to control than making several uninterrupted passes and only then deciding how to remove the excess.
Find a short path of light along the cheekbone
Look straight into the mirror, then turn a little to each side to identify the raised part of the cheekbone that already catches light. Choose a short section around it as your starting point. There is no need to brighten the entire under-eye area or carry the same width of powder into the inner cheek. Rest the broad face of the 116 at an angle that follows the curve, moving lightly enough for the tips to bend only slightly. A longer highlighted strip occupies more visual space on the face, so start short and extend its end gradually to find the balance you like.
For more defined emphasis on the high cheekbone, keep the central bright section and soften only its edges. For a wider sheen, disperse a smaller amount without repeatedly adding fresh powder across the entire cheek. Everyone does not need identical placement according to a prescribed face shape. Consider how your cheek moves when you smile, where you usually wear blush and where glasses make contact. Choose an area that works with those details. Leave room around the eye rather than bringing a broad powder brush too close; this also reduces the chance of loose particles travelling toward the eye while you work.
Connect the edges without loading more product
Once the brightest section is in place, use what remains on the bristles to tidy the surrounding area. Rotating toward a relatively clean face of the head, or using a separate clean brush, makes it easier to work on the boundary without adding more shine. With short, light sweeps, connect the end of the application to the skin beyond it. Constantly changing the contact area and moving back and forth can make the original placement harder to follow. Watch the outside edge of the bright section and work on small portions. Concentrating on that boundary instead of rubbing through the centre helps preserve the location you selected.
If the result remains a thin, obvious stripe, reduce the amount and pressure before filling the surroundings with more highlighter. Continually scrubbing a heavy deposit with a dry brush in an attempt to erase it can move the base underneath. If it still looks too bright after the edges are softened, carefully tidy it with a clean puff or another suitable tool you were already using, then repair the base locally if needed. Next time, change either the initial load or the length of the stroke first. Adjusting one variable at a time makes it easier to remember which movement works for you.
Use only part of the tip on the nose and cupid’s bow
Product directions suggest the bridge of the nose and brow bone, with the cupid’s bow and chin as examples for finer touches. Treat these as choices rather than a sequence of compulsory highlighted areas. The cheekbones alone may be enough, and someone whose central face already looks reflective may prefer a much smaller additional amount. For the nose bridge, let only a small part of the 116’s tip touch and choose a short section. Pressing the broader face across the sides of the nose can produce a wider bright area than intended. Select the points you want rather than automatically connecting the whole bridge with equal intensity.
The cupid’s bow is the small area above the central contour of the upper lip. Place very little product on the desired skin area without dragging the bristles across the lips and their lip colour. On the chin, check the result from the front and side before making another broad sweep. If highlighting the brow bone, stay well away from the eye and lash line; change to a smaller tool if selecting a narrow area proves difficult. When working on several points, look at where the light gathers across the whole face instead of judging each point in isolation. This helps keep the combined emphasis proportionate.
Manage colour transfer when using it for blush
The 116 is also presented as a blush brush, using its rounded face to spread powder colour over the cheek. Decide the position and area first, pick up a small amount and connect it along the curve. A strongly pigmented blush can concentrate where the head first touches, so do not start with a large load simply because you want a wider spread than with highlighter. Treating the central colour and outer edge as separate parts makes it easier to avoid a single round patch. Because the same tool may handle more than one cosmetic, inspect the remaining colour on the bristles before changing products.
Loading pale highlighter immediately after blush can transfer pink or red pigment from the hair into both the highlighter pan and the next application. Conversely, shimmer left from highlighting can introduce unwanted sparkle into a matte blush. A separate brush is the simplest arrangement when using both in one makeup session. If one brush must cover both roles, clean it appropriately between colours and use it again only when fully dry. Wiping it a few times on a dry cloth reduces surface powder, but does not mean that all strong pigment and oily residue have been removed. Plan the order around that practical difference.
Look at the highlighter’s colour and the lighting
A highlighter whose underlying colour differs markedly from your skin can leave a pale patch even at an angle where it is not sparkling. Silver, champagne, gold and pink products vary in actual pigmentation and particle appearance, so check a small amount before loading the brush heavily. When the glow seems weak, turn your face and change the angle of reflection before layering more. A section that looks quiet straight on can become much stronger from the side. What you are adjusting with the 116 is the area and amount of reflection, not converting the cosmetic’s own underlying colour into a different one.
After looking under your makeup light, assess the whole face in another setting, such as soft daylight near a window. A phone camera can change the apparent size of the glow through exposure and processing, so avoid repeatedly adding product only to match its screen. For a light daytime look, begin with one small section; for the evening, add only what you need over the existing placement. First notice how oil and perspiration have changed the surface rather than broadly covering that layer with more powder. Controlling the area according to the mood you want also makes it easier to balance the highlight with the rest of the makeup.
Check uneven deposits and lifting in a useful order
If powder sticks in one place, first check whether that contact point was damp or the brush held too much product. A long bright line can result from a narrow contact surface or repeated passes accumulating along the same path. If almost nothing shows, inspect the load and the direction of the light before gradually adding more. Pressing harder is not the answer to every problem. Pressure that pushes the bristles far sideways can take the product outside the intended area or move the base. Consider amount, placement and pressure separately rather than changing all three without knowing which one caused the difficulty.
If shimmer draws attention to uneven texture or dry patches, reduce brightness there or move the emphasis slightly. Repeated brushing is not a way to change the skin’s underlying texture. If the two sides look different, first check whether the lighting is comparable, then compare the initial load and length of application. Adding fresh product during every correction only increases intensity, so pause and look at the whole result. After removing the makeup, remembering which formula and which part of the head you used can make the next application easier. This is a more useful habit than assuming that one fixed stroke will suit every product and base.
Separate everyday powder removal from washing
After use, gently wipe remaining powder onto a clean, soft dry cloth or tissue, following the direction of the bristles. Avoid pushing hard against their direction or rapidly rubbing them on a rough surface. Pale highlighter can remain between the hairs even when pigment is difficult to see; blush makes leftover colour more obvious. Tidy cosmetic residue from the handle and the outside of the ferrule too, so it does not transfer to your fingers next time. This is routine powder removal. Washing plays a different role in maintaining a brush that has also come into contact with oils from the face.
The brand advises lukewarm water, a dedicated cleanser and drying with the hair pointing downward. Choose a cleanser whose instructions allow natural hair and follow its rinsing and drying directions. Consider both frequency of use and the state of the residue when deciding when to wash. Continuing colour transfer, clumped hairs or difficulty depositing product evenly are reasons to attend to the brush. Keeping it as a personal tool rather than sharing it is also part of care. More cleanser or more vigorous rubbing does not replace handling the hair and the assembled parts gently and according to their different needs.
Control the direction of water and the drying position
When wetting the bristles with lukewarm water, point them downward so water does not continually run toward the handle. Work a small amount of suitable cleanser through gently without twisting the head or scrubbing roughly into the roots. Washing mainly the hair is more appropriate to the assembled construction than leaving the whole brush soaking in a cup. After rinsing, look for remaining foam or cleanser, then press with a clean towel to remove water. Avoid gripping the hair in the towel and pulling hard. The aim is to clean the working part while keeping the connection and the shape under gentle control.
Reshape the damp head into its rounded outline, then support the brush with its tip downward in a shaded, ventilated place. Do not stand it wet in a cup with the handle at the bottom. Drying time depends on room humidity and remaining water, so a fixed number of hours cannot guarantee readiness. Check that the inner part is fully dry even when the surface seems dry, and avoid trying to accelerate the process with a hot hairdryer or a position directly beside a heater. The cover protects the shape; put it on after drying is complete rather than enclosing damp bristles for travel.
Travel with the cover and watch the condition of the hair
Product information states that one cover sized for the brush is included. Before fitting it, arrange the hair so that strands do not fold or bend out of the opening, and check that your pouch is long enough for the whole handle. At 19 cm overall, the brush may not fit a small wallet-style pouch designed for short lip brushes. When travelling, allow for drying time and clean it before departure rather than at the last moment. Keep it from contacting open creams or loose powders inside the pouch. If the cover itself becomes dirty, care for it according to its material and let it dry before use.
The brand notes that a small number of loose hairs may appear initially with natural-hair brushes. If substantial shedding repeats or the joint becomes loose, record the condition and your use and cleaning routine, then contact the seller. General brand guidance also discusses natural-hair odour and initial dye release, but that is not a reason to dismiss every unusual condition as normal. Do not trim the ends with scissors to correct a distorted shape or twist a loose joint in an attempt to repair it. Checking the model name, original shape and included items when the brush arrives also gives you a reference for later comparison.
Three purchasing questions and a simple working sequence
When considering the 116, ask whether your usual cosmetic is powder, whether you want to cover a relatively broad area such as the cheekbone, and whether you want to maintain a goat-hair tool. Its shape is worth considering for someone who joins areas of glow and occasionally applies powder blush. A very tiny-point makeup style or a mainly cream-based routine may work more conveniently with a smaller tool or a brush intended for that texture. On the purchase screen, confirm the 116 model number and the actual selected contents. Puffs or mirrors mentioned in another buyer’s set review are not automatically included with the current single-brush option.
Compare prices for the same model and actual contents, including the cover, then account for shipping charges and discount conditions for your destination. On arrival, inspect the shape and ferrule and prepare the brush according to its instructions. A simple sequence is to let the base settle, load a little powder, apply lightly to a short cheekbone section, connect the edges without more product and turn your face to assess the result. Choose any smaller accents afterwards. Controlling one or two areas of light, instead of automatically brightening the entire face on every occasion, gives this rounded brush a clear and repeatable role in a makeup routine.
Reviews 1
Thin, even application
I bought it to add beautiful highlights over a wide area I'm glad I was able to apply it very cleanly, thinly, and evenly
ti*****
A little closer to Korea.
Thank you for reading.