A puff for the final thickness of your base
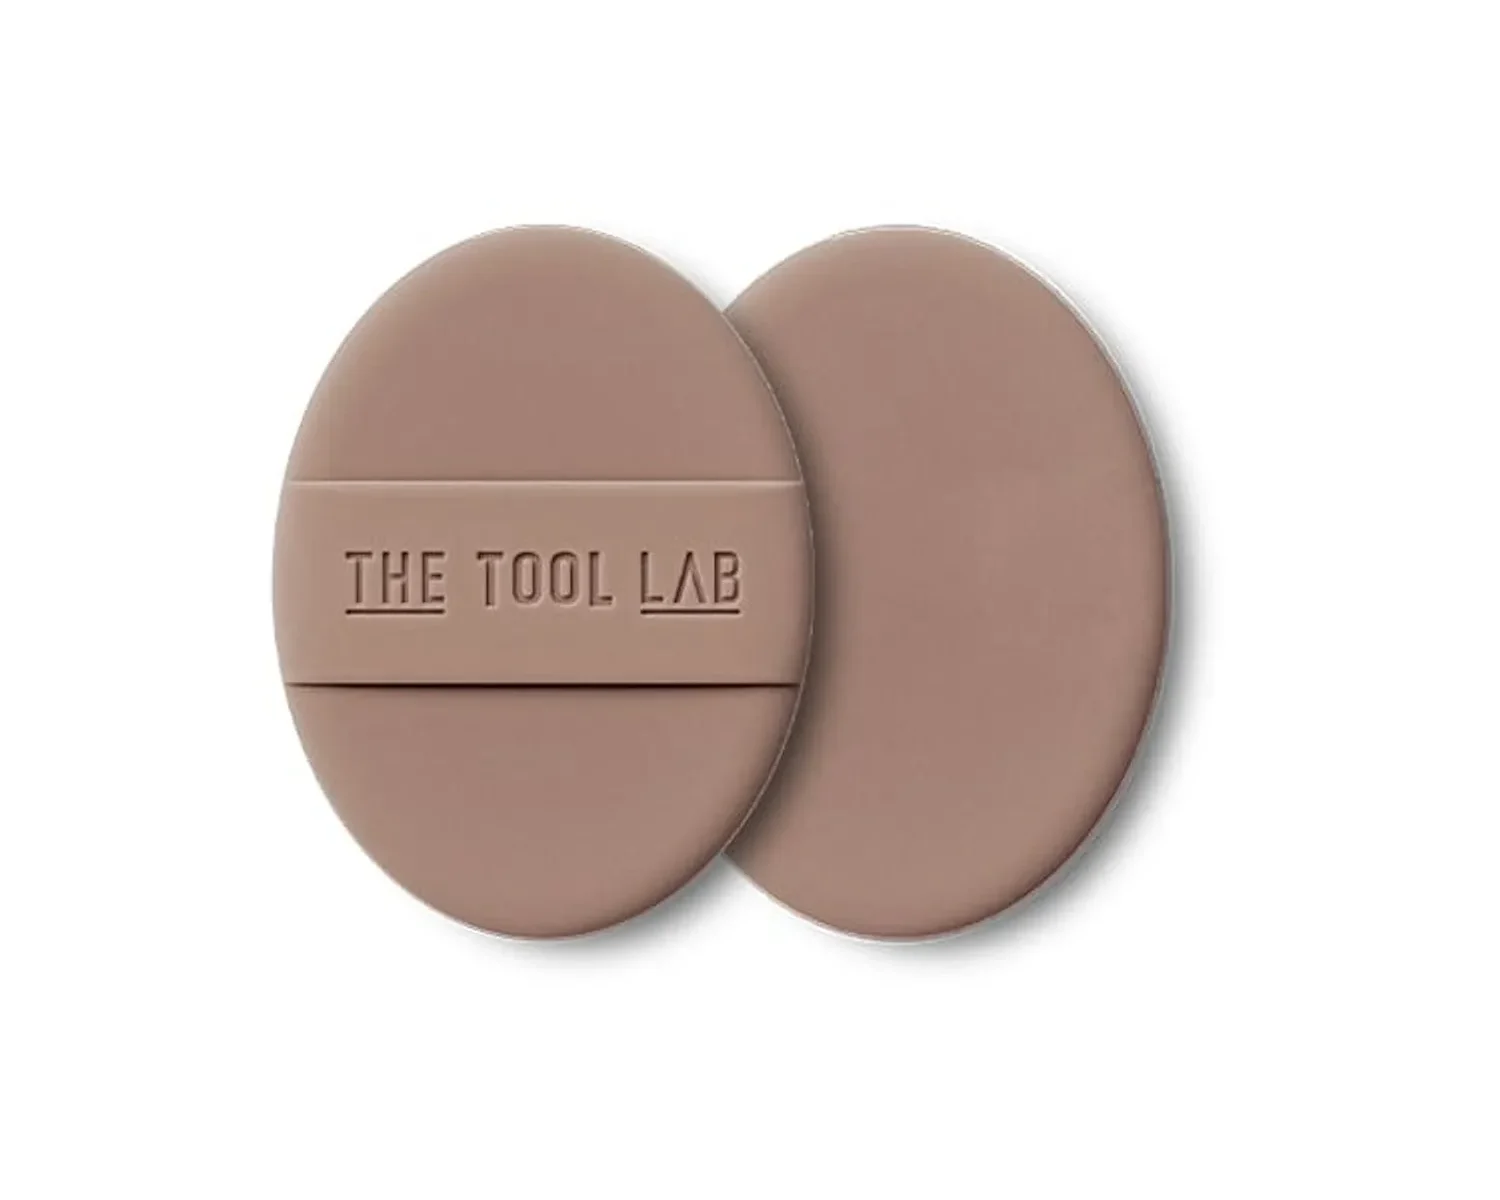
The finish of foundation depends partly on how much remains on the skin and how evenly that amount is distributed. THE TOOL LAB Glow Puff approaches this stage through a flexible contact surface that presses and lifts across the contours of the face. Rather than sweeping foundation over a large area with bristles, it brings a small section of the base into contact with the puff at each touch. This makes it useful for someone who prefers a controlled pressing rhythm and wants to build the finish gradually.
Glow describes the puff’s place in the brand’s range. The foundation still provides the colour, coverage and much of the final sheen. A luminous formula and a matte formula will not become identical simply because the same puff applies them. The practical aim is an even, thin layer that retains the finish you chose, with extra coverage only where it helps. Thinking about thickness and placement gives the puff a clearer role than expecting a tool alone to create a particular complexion.
Check the exact version before choosing a pack
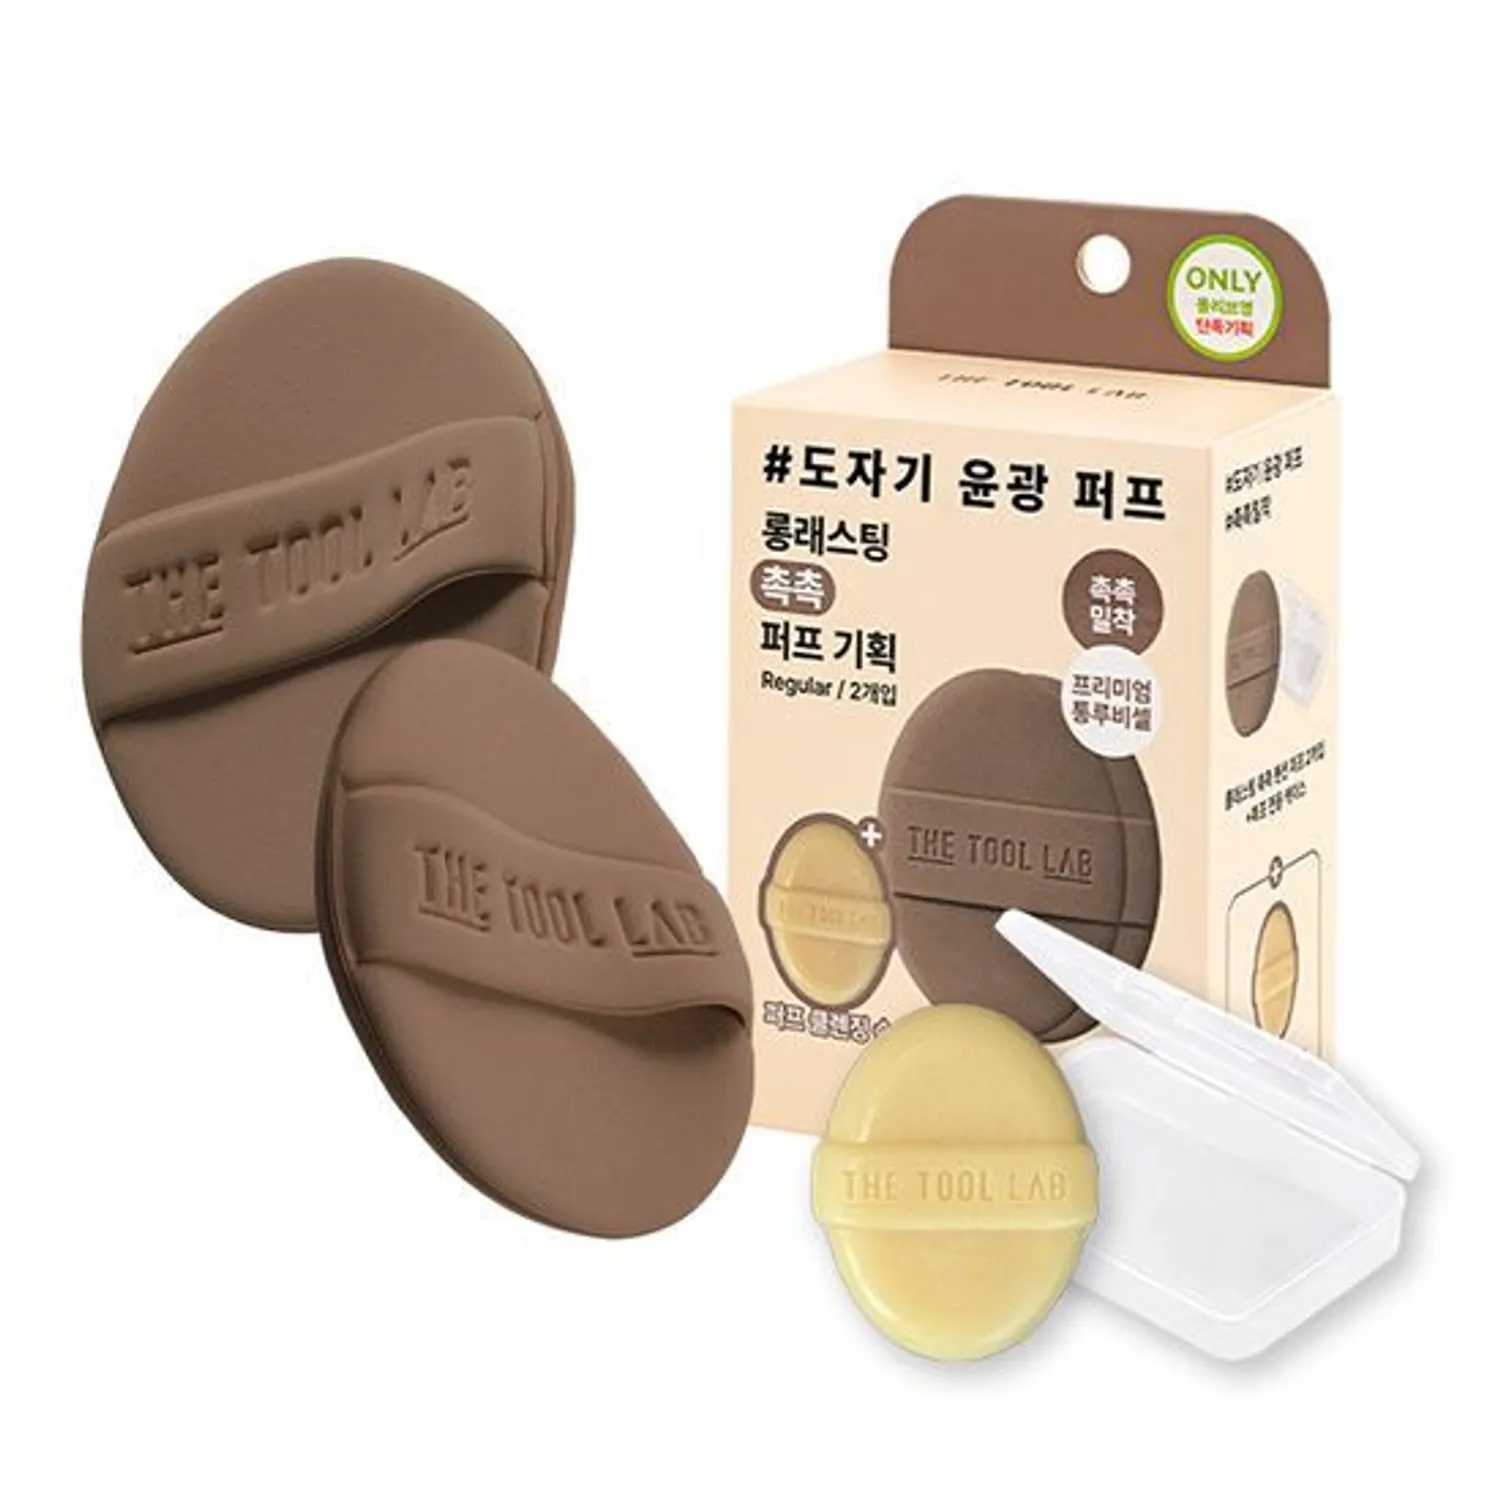
The current OLIVE YOUNG Global listing separates Regular 2P, Round 2P and Thick 2P, plus a Regular 2P set with a case and Mini Tool Soap and a Round 4P set with Mini Tool Soap. These names describe different selections, not everything supplied in one purchase. The yellow puff-shaped item in the set photograph is the mini soap. The product information names TTL Co Ltd as manufacturer and South Korea as country of manufacture. The detailed material description calls the puff Rubycell Premium Puff; the practical distinction is its flexible makeup contact surface, rather than an assumption that every similarly coloured sponge has the same construction.
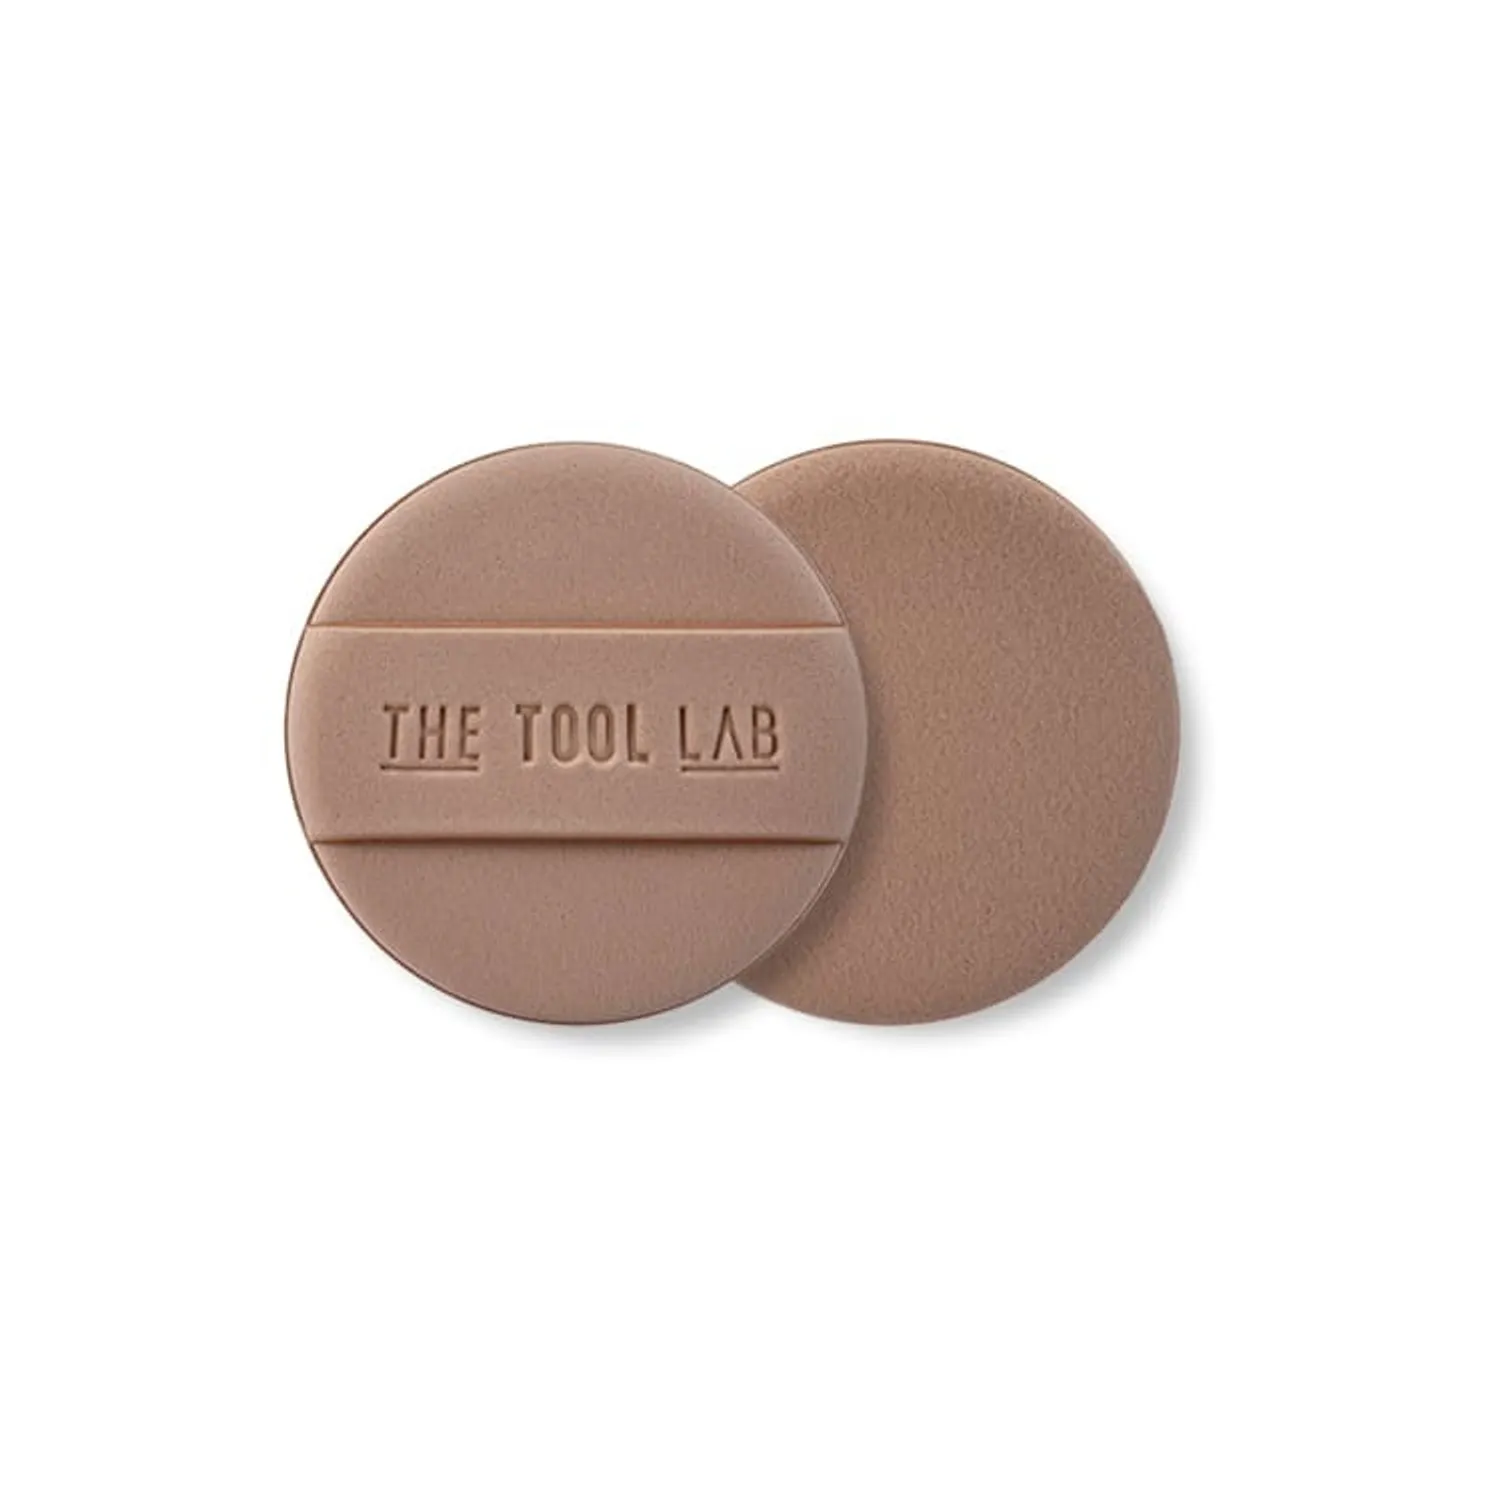
Glow should be distinguished from Matte, Cover, Airy and Happyrim Aqua. The Regular photograph shows an oval format and the Round photograph a circular one. For a replacement inside a cushion compact, check the selected puff’s measurements against your own compartment; a round shape alone does not establish a fit. Thick is a separate option, so do not assume its thickness from a Regular photograph. For dressing-table use, consider how the shape sits under your fingers and reaches the cheek and nose. Two puffs can alternate while one dries; a four-puff pack provides more clean replacements. Confirm the exact option and included accessories before ordering, since a photograph of a set does not describe every selection.
Let the surface, edge and strap do different jobs
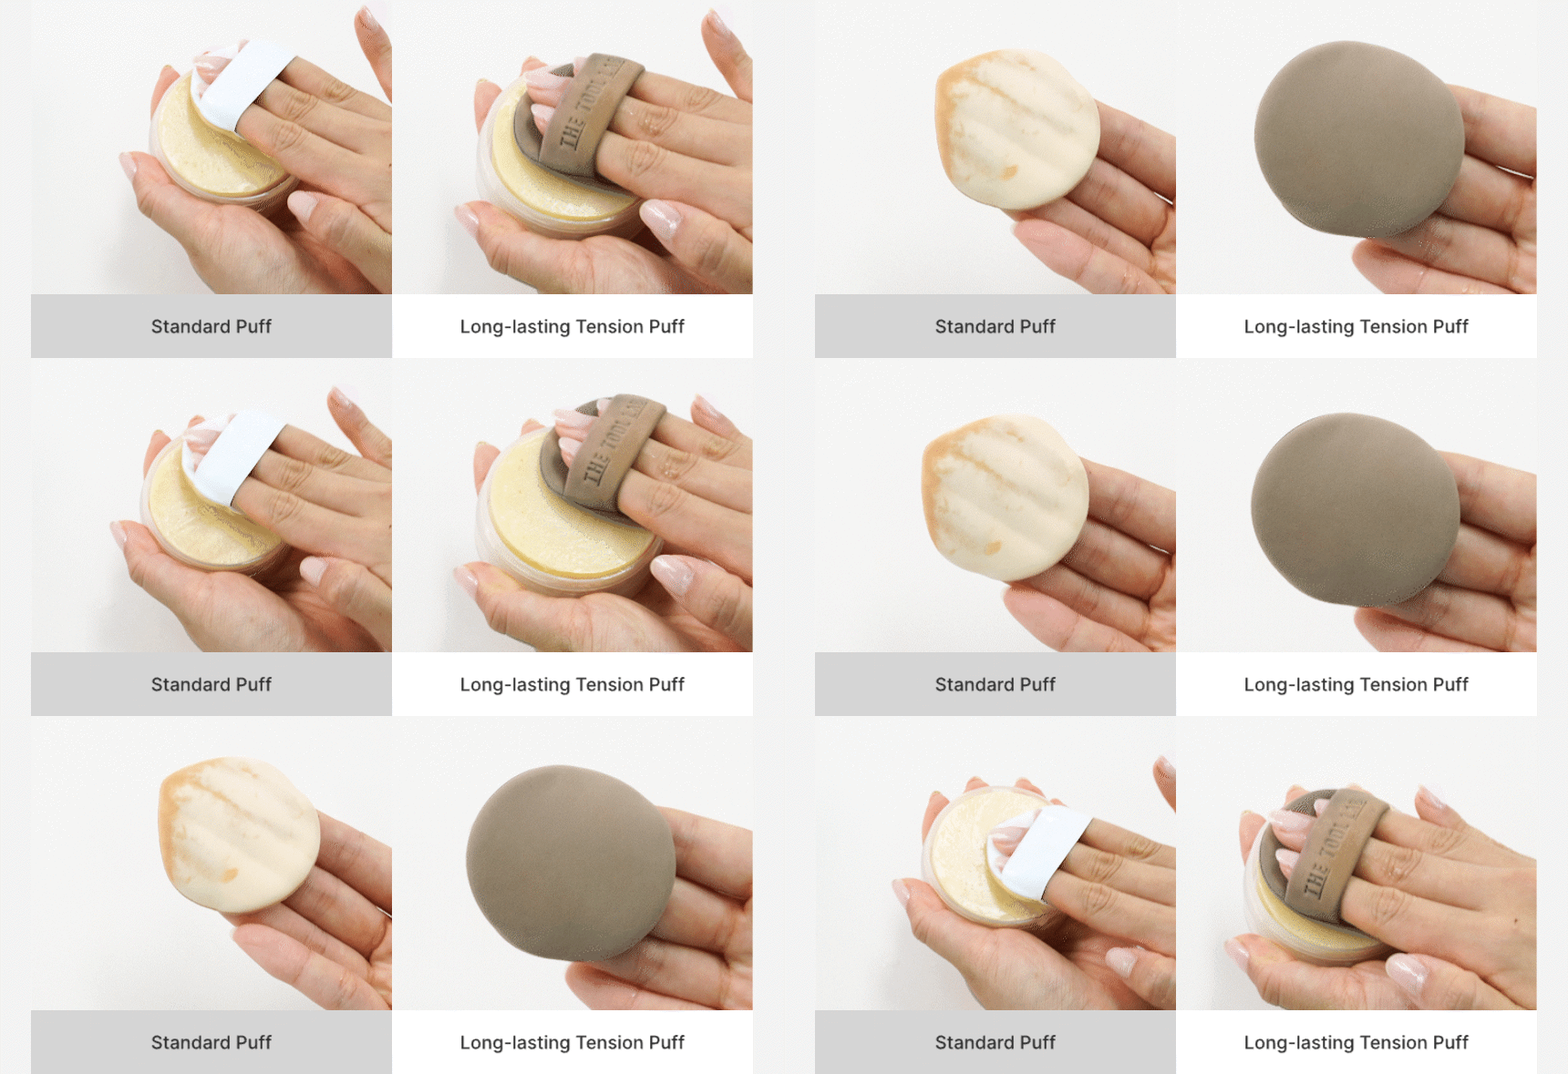
The broad face is the main working area for cheeks and forehead. The curved edge approaches smaller contours, while the strap steadies the puff against the fingers. Slide your fingers fully under the strap towards the end of the puff, as the brand suggests for a more secure hold, without stretching the band excessively. Check that the puff follows the movement of your hand. Your fingertips should guide the contact rather than driving hard through the material. The useful amount of pressure is enough to bring the surface into contact with the skin, not enough to flatten it aggressively.
Turn the puff as the face changes direction. On the open cheek, a broad section can meet the skin; beside the nose, present a narrower curve. You do not need to force the same full surface into every hollow. Keep track of which part contains fresh foundation and which part is relatively clean. That distinction lets you place colour with one section and soften a boundary with another. It is more controlled than repeatedly loading the whole puff and then trying to remove excess from the face.
Match the method to the foundation
With a liquid foundation, begin by spreading a small amount on a clean palette or placing a few modest dots on one area of the face. With a cushion foundation, pick up lightly from its surface rather than pushing until the puff is soaked. Both approaches work towards a thin, even coating on the part of the puff that will touch the skin. A highly fluid product and a concentrated cream need different quantities, so a fixed instruction such as one full pump cannot suit every formula.
Start with the Glow Puff clean and dry. Do not automatically soak it as though it were a water-activated makeup sponge; the separate Aqua range and instructions for a particular version should not be transferred to Glow by name alone. Added water changes the way foundation spreads and can make the amount harder to judge. Follow the directions for the exact puff and makeup being used. If a formula sets quickly, work in small sections; if it remains mobile for longer, allow the base to settle before adding another layer.
Prepare the skin without overloading the routine
Complete skincare and sunscreen first, allowing the products to settle as directed. If the surface is still very wet or slippery, give it more time rather than immediately adding more foundation. A puff cannot make an unstable stack of layers behave like a well-prepared base. Check whether the skin feels ready for makeup and whether any product is visibly collecting around the nose or hairline. Starting with a manageable surface reduces the temptation to press harder when the foundation begins to move.
Use clean hands, a clean puff and a mirror under reasonably even light. Looking only under strong light from above can exaggerate shadows and encourage unnecessary coverage. Keep a clean palette or suitable mixing surface within reach so the amount is visible throughout the routine. If you are learning, keep the same foundation for several attempts and change the application quantity or pressure one at a time. This makes it easier to understand the puff’s effect instead of guessing which of several new products caused the difference.
Distribute a little foundation before touching the face
A small amount spread thinly on a palette is easier to control than a large pool absorbed into the centre of a puff. Touch one working section into the thin spread, then check the imprint on a clean part of the palette. An even, light mark suggests that the contact surface is coated; a thick ring or wet blob suggests excess. The purpose is not to load as much as the material can hold. It is to carry an amount that can be placed without needing a long correction afterwards.
If you prefer dotting foundation directly onto the skin, use a few small dots on one cheek and blend that area before moving on. Covering the entire face with a fast-setting formula at the beginning can leave the last area difficult to blend. Keep unused product separate from the puff’s used surface, and avoid returning residue to the original container. A small second addition is easier to manage than starting with too much and repeatedly pressing in the hope that the excess will disappear.
Finish one cheek before moving around the face
Begin near the centre of one cheek, where you can see and control the puff’s contact clearly. Press and lift, moving gradually towards the outer cheek with the amount already on the surface. As the product becomes lighter, use it to connect the base towards the jaw and side of the face. This creates a natural reason for the outer area to receive less foundation, instead of adding an equally heavy fresh load to every part of the cheek.
Pause when the section looks even. Check the lower cheek and jaw from another angle before starting the other side. If more coverage is needed, add a little only at that location rather than repeating the whole section automatically. Then continue with the other cheek, forehead and chin in a sequence that suits your face. Working section by section is especially useful for quick-setting formulas and also makes it easier to notice where the base is becoming thick. The routine should progress across the face, not keep returning to an already finished patch.
Use a press-and-lift rhythm with small overlaps
The basic movement is contact, light pressure and a clear lift. Shift the puff a little and repeat, allowing neighbouring contacts to overlap slightly so that separate stamps do not remain visible. This differs from dragging the puff continuously across the skin, which can move foundation into a line or disturb a layer below. The hand should travel between contacts, while the puff is lifted, rather than pulling the material sideways while it is pressed against the face.
More repetitions are not always better. If the base is already smooth, repeated pressing may simply pick up and redistribute the same product. If a mark from the puff appears, check the loading and angle before increasing force. A saturated section may need to be unloaded on a clean surface, while an edge that catches the skin may need a gentler orientation. The useful rhythm is deliberate and light, with enough pauses to see the result. It should feel like placing and joining thin areas, not trying to compress the skin.
Use the curved edge at the boundaries
Around the sides of the nose, angle a smaller part of the puff towards the curve and use less product than on the open cheek. Avoid pushing foundation into the nostrils. Near the mouth, relax the face first, then make a normal expression to check whether product gathers in a fold. Lift that small excess before adding anything else. These areas move during the day, so beginning with a thick, opaque line makes later maintenance more complicated.
At the hairline, brows and jaw, use a lightly loaded edge to connect the colour without coating hair or creating a visible border. Turn the head in the mirror to inspect the transition rather than looking only straight ahead. Around the eye, keep the puff on the intended external skin and comfortably away from the eye and lash line; a smaller suitable tool may be easier for a very narrow area. Do not force a broad puff into a space where you cannot see the contact point clearly.
Add local coverage after the overall layer
Once the first layer is even, decide whether a particular area still needs foundation or a separate concealer. A small addition of foundation may be enough for a broad but faint difference in tone. A concentrated mark may be easier to handle with a small concealer brush, followed by a very light touch at its boundary if needed. These are different tasks. Repeating a full layer across the whole face to cover one stubborn point usually adds product where it was not required.
Leave the centre of carefully placed concealer relatively undisturbed. If the puff is used afterwards, choose a clean or minimally loaded part and touch only the transition. Pressing a fresh foundation-coated surface over the entire correction can shift its colour and coverage. Check the result from a normal viewing distance, since close magnification encourages chasing every natural detail. Colour can be made more even while some skin texture remains visible. The aim is a coherent base, not a thick layer intended to erase every contour.
Separate a luminous finish from excess shine
A glow finish can show light on the curved parts of the face without requiring every area to look equally shiny. After the base has settled, look at the forehead, nose and cheeks separately. If only the centre feels too reflective, a small amount of powder there may be enough. Using powder everywhere out of habit can change the finish you chose, while avoiding it everywhere simply because the puff is called Glow can leave a result you do not enjoy.
Use a separate clean powder tool rather than loading loose powder onto a foundation-soaked puff. This keeps the application more predictable and avoids a thick mixture on the same working surface. Finish colour corrections before setting, since fresh cream is harder to blend over a heavily powdered area. Apply powder lightly and inspect again. The glow of the final base comes from the foundation, skin preparation and placement together, so adjusting one region at a time is more useful than treating the whole face as either completely matte or completely glossy.
Combine a brush and puff with a clear division of work
A brush can spread foundation thinly before the puff presses and joins the surface. This is useful if you like a brush for distributing a measured amount but prefer the puff for the final contact pattern. After the brush stage, the puff does not automatically need another full load of foundation. Start with a clean working surface or very little additional product and inspect whether pressing alone is enough. Otherwise, a two-tool method can quietly become two complete foundation layers.
If you use cream blush or contour, keep colour residue separate from the section used for foundation. A fresh puff or a clearly separate clean area makes it easier to avoid dragging pink or brown into the centre of the face later. Follow the makeup product’s instructions and work with a small amount at the edge of the colour. The Glow Puff can be part of a broader base routine, but assigning different jobs to clean surfaces matters more than making one loaded surface perform every task.
Retouch the problem you actually see
Before touching up, identify what has changed. Shine may need gentle blotting; a little colour loss may need a small amount of foundation; product gathered in a crease may need removing. These are not the same problem. Start with clean hands and a clean application surface, then make the smallest correction that addresses the visible issue. Adding a full new layer over oil, powder and gathered makeup often makes the surface more complicated instead of restoring the original thin finish.
For a small area where colour has worn away, use a lightly loaded portion and connect it to the existing base without dragging across the whole cheek. If the surface is already dry and uneven, a local reset may be more practical than repeated pressing. Carrying a clean spare can be useful, particularly if the morning puff is still coated in product. Keep the used puff separate during transport and clean it after returning home, rather than letting old residue become the starting layer for the next day’s makeup.
Wash gently and rinse thoroughly
For washing, the brand instructs users to soak the puff thoroughly in lukewarm water, then gently knead it with a dedicated puff soap or mild cleanser. Remove loose excess foundation first and work patiently through the used areas. Work the cleanser gently through the material instead of scraping the surface with fingernails. Pay attention to the working face and edges, where makeup may remain even when the centre looks cleaner. Rinse repeatedly until the water is clear and no slippery cleansing residue remains. A quick rinse that leaves foundation inside is not the same as a complete wash.
Press out water gently without twisting the puff or pulling the strap. Restore its shape and leave it in a ventilated place until completely dry. Avoid packing it into a closed compact or pouch while damp, and do not use strong heat to hurry the process. The next application should begin with a clean, dry surface so that leftover water does not unexpectedly thin the foundation. If the washing instructions for your exact version differ, follow those directions rather than transferring care rules from another type of sponge.
Plan drying time and replacement together
A simple rotation can make regular cleaning easier: one puff is ready while another dries fully. This is a practical reason to consider pack quantity, especially for daily makeup. Let the clean puff dry away from splashes and loose cosmetic residue, then store it where its surface stays protected and its shape is not crushed. A case is useful for a dry puff in transit, but it is not a substitute for drying time or a place to keep a damp, used tool sealed away.
The brand recommends replacement every two to three months when the puff is used daily and washed once a week. That is a stated use-and-care scenario, not a reason to keep a damaged or dirty puff until a calendar date. Check the surface, seam and strap during cleaning. Tears, peeling layers, a permanently distorted shape or residue that cannot be removed are reasons to stop using it earlier. Keep puffs personal and avoid applying over irritated or damaged skin. Preparing a clean spare before the current one wears out also avoids the rushed choice between reusing a dirty puff and applying makeup with one that has not finished drying.
Choose for your own foundation routine
Glow Puff is most useful when you enjoy applying foundation through light pressing and want to control the amount section by section. A broad flexible surface can make cheeks straightforward, while the edge helps connect smaller contours. It will not replace the precision of every small brush or make every foundation produce the same sheen. Compare it with the tool you already use: the question is whether the shape, grip and pressing method make your own daily process easier to control.
When buying through OLIVE YOUNG Global, confirm the Glow option, actual size, pack quantity and current delivery conditions. Check whether any brush or case pictured is included in that specific selection. At home, begin with the foundation you know, a clean dry puff and a small amount of product. Finish one area, inspect it, and add only where needed. Keeping the application thin and the tool clean gives the puff a practical role that continues beyond the first attractive impression of a promotional photograph.
Reviews 1
Softness and handling
It's thin, soft, and doesn't feel easy to operate; I haven't mastered how to use it yet.
an*****
A little closer to Korea.
Thank you for reading.