A Brush for Soft Areas of Shadow
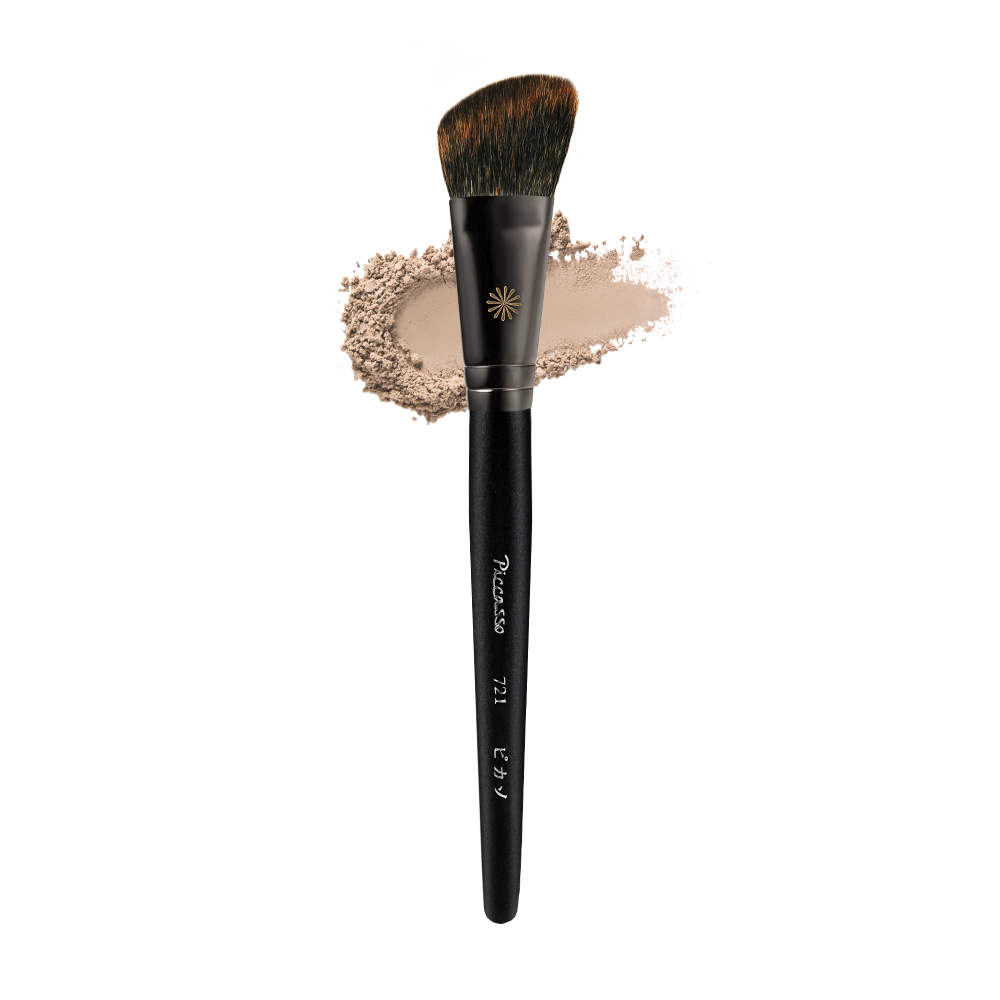
Contour often looks awkward when there is a clear boundary between the area with powder and the skin beside it. Drawing a dark stripe and then rubbing it for a long time may seem like a solution, but this can disturb foundation or spread the shadow farther than intended. The PICCASSO 721 is a face brush with a rounded, angled head. Think of it as a tool for placing a thin layer of powder over areas such as the outer cheek and jaw, then softening the edges. The final effect depends on the powder shade, the condition of your base and your hand pressure as well as the brush.
In Korean beauty shopping, “shading” refers to makeup that adds shadow-like color to the face. It overlaps with contouring, but does not require strong lines or an identical pattern on every face. It can also serve a different purpose from bronzing, which often adds sun-warmed color. Start with a light application on one outer-cheek area and decide what change you actually want to see. Rather than following a rule that your face should look smaller, identify where you would enjoy a little more depth in your usual makeup. This gives the brush a clear task.
Understanding the Rounded Angle
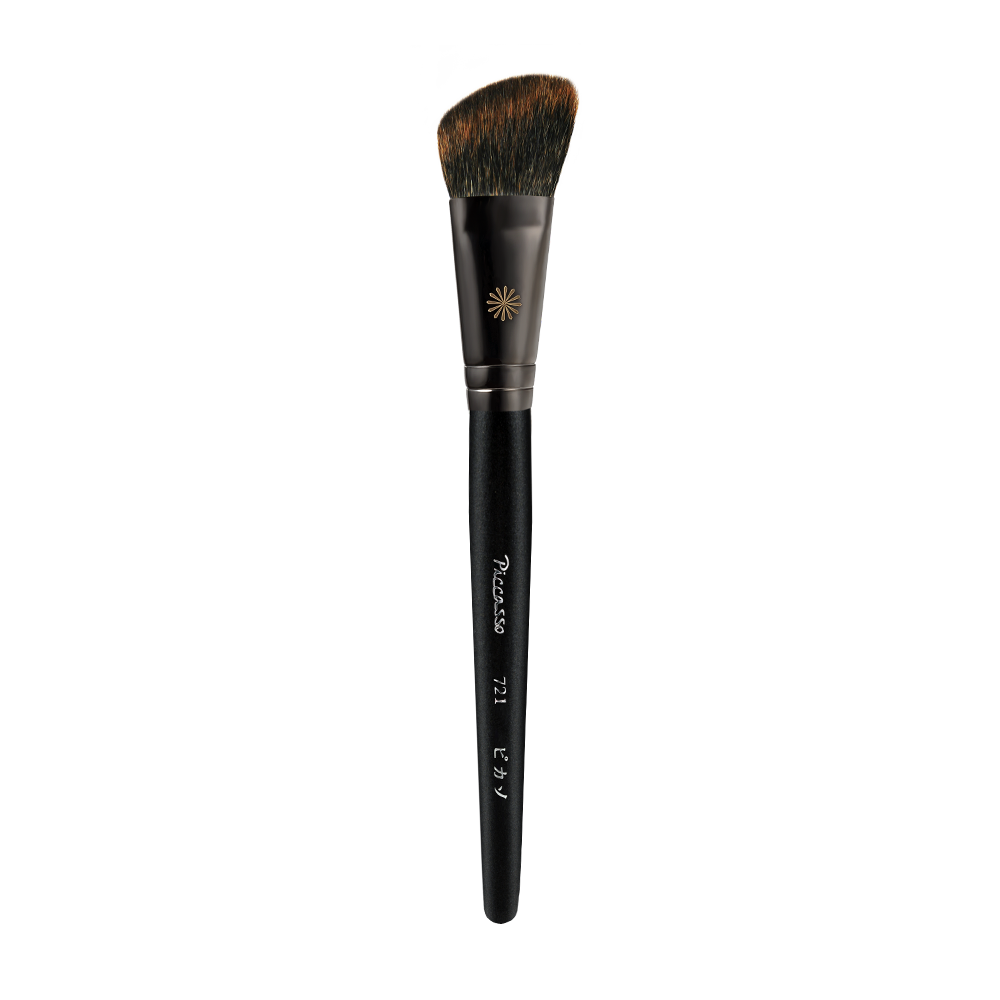
Viewed from the front, the ends of the 721’s bristles rise higher on one side than the other. The outline is rounded rather than sharply straight. Pressing the whole head flat therefore creates a different contact area from touching the skin lightly with the tips. Following the curve of the outer cheek with the angled face can cover a relatively broad area, while holding the handle more upright reduces the area in contact. Before loading any powder, place the clean brush against your cheek in a mirror and notice how much the bristles spread at different angles.
There is no universal rule that the longer or shorter side must always point in a particular direction. Aim for light contact that follows the curve of your face, without pressing the metal ferrule toward the skin. Keep your elbow comfortable and make short movements instead of locking your wrist at a sharp angle. Notice how much of your cheek the head covers. A head a little over three centimeters wide can feel broad depending on your face and the shadow you want. Use the area visible in your own mirror as a reference rather than copying a model’s placement exactly.
Size, Materials and Manufacturing Details
The brand lists a total length of 20.4 cm, with a head measuring 3.4 cm across and 3 cm in bristle length. This is a full-length tool with room to adjust your grip, and a size better suited to cheek and jaw areas than to a narrow nose contour. The listed materials are gray squirrel hair, a brass ferrule and a wooden handle. Anyone who prefers to avoid animal-derived bristles should take that into account before buying. Color and shine in a product photograph cannot reliably tell you whether hair is synthetic, so compare the model number with the current specification.
The manufacturing details also deserve to be read separately from the brand’s nationality. The official specification lists China as the country of origin, Korea for the handle and Korea for assembly. It is a Korean-brand product, but describing every component as made in Korea would be inaccurate. Its wood handle and joined bristle head also explain why leaving the entire brush soaking in a cup of water is unsuitable care. Understanding the construction is useful both when deciding whether to buy and when keeping the shape and joints in good condition after use.
Match the Powder to Your Base
The 721 is designed primarily for powder shading. Look for a shade that creates the sort of shadow you want over your skin and foundation, without assuming that gray is correct for everyone. Check whether it appears conspicuously orange or leaves an ashy patch. A powder with strong shimmer may reflect light more noticeably than it creates shadow. A swatch on the back of your hand helps you assess color and pigment, but your hand and face can have different undertones. Make the final judgment with a small amount on the outer face.
If foundation or sunscreen remains tacky, powder can cling heavily to the first place it touches. Let your base settle before starting, and, if appropriate for your routine, lightly set the intended contour area with translucent powder. This does not mean adding a thick powder layer to already dry skin. Learn how your usual base finishes and how much settling time it needs instead of repeatedly touching your face to check. If cream contour is your main product, choosing a separate tool suitable for that texture can make application and cleaning more straightforward.
Find a Comfortable Grip and Pressure
Holding the brush close to its ferrule, like a pencil, transfers small hand movements directly to the head. This can help with control, but can also encourage heavy pressure. For broad, light shading, start with a loose grip around the middle of the handle and relax your thumb and index finger. A long handle does not mean you have to hold it at the very end. Leave room between your face and the mirror, and find a grip that lets your wrist move comfortably without making the head wobble.
On the back of your hand, compare a stroke that barely bends the tips with one that flattens the entire head. On the face, begin with the lighter pressure, keeping the bristles from splaying widely. Pressing harder is not necessarily the way to distribute powder evenly. Repeatedly rubbing a finished base can change its surface. After a few movements, lift the brush away and look at the result from a little farther back. Pausing makes it easier to notice when color is accumulating simply because your hand has kept moving.
Load Less Powder and Use What Remains
For a first application, touch one face of the head lightly to the powder once or twice rather than scrubbing it across the pan. How much comes off depends on the powder’s firmness and pigmentation, so judge the amount on the bristles instead of treating a fixed number of taps as a rule. Gently tap away excess over the container edge or a clean tissue. There is no need to strike the metal joint or twist the bristles. Starting with less is generally easier than trying to remove a heavily loaded first stroke from your face.
A pass over the back of your hand shows how strongly color is deposited at first contact. This is a test of color and quantity, not a diagnostic test for an allergic reaction. On the face, begin toward the outside, where you want the deepest part of the shadow, and use the remaining powder to connect the edges. Reloading every time you blend makes the area darker instead of softer. Begin the other cheek with a similar amount and approach, then assess the two sides visually rather than assuming the same stroke count guarantees a match.
Make the First Stroke on the Outer Cheek
With your face relaxed, look for the natural shadow below the cheekbone and toward the area in front of the ear. Exaggeratedly sucking in your cheeks can produce a guide that looks different once your expression relaxes. Place the angled face of the 721 lightly against the outer cheek and make a short inward sweep. Do not drag a heavy first deposit across a long line. Keep the initial area small enough to judge both the amount and direction. Starting with color that fades before reaching the mouth area usually makes the boundary easier to manage.
The next movement should connect the surrounding area rather than forcefully erase the first stroke. With powder left in the head, lightly sweep the upper edge and, if helpful, turn the handle slightly to change the contact surface. Decide where the brush will stop so that you do not keep moving powder toward the center of your face. Check the result both straight on and with your head turned a little. Add another very thin layer where more depth is wanted, but stop when the effect you intended is already visible.
Blend an Edge Without Adding More Color
A natural-looking contour depends greatly on the transition at its edge. After placing color, lightly wipe excess from the 721 on a clean tissue and work with short movements along the boundary. A separate clean face brush can also help with the final transition. Large repeated circles across the whole cheek can spread contour into areas where you do not want it. Distinguish the edge you want to soften from the center you want to keep. This makes blending a targeted adjustment instead of a process of moving everything around.
A very close mirror view magnifies small differences and can encourage endless correction. Step back about an arm’s length, assess the whole face, and return only to the areas that need attention. Where blush meets contour, look for two separate bands of color. Avoid using residual dark powder to sweep widely over the brighter blush area. A soft boundary does not mean removing the contour altogether. The aim is to preserve its position and depth while making its beginning and end less abrupt.
Connect the Jaw Area to the Neck
For the jaw, first check placement in a comfortable, everyday posture rather than jutting your chin forward or stretching your neck. Place a small amount just below the outer jawline, then gently soften the remaining color toward the neck. An isolated dark outline can make the face and neck look disconnected. Use the broad surface of the 721, but do not expand the task into covering your whole neck with contour. Turn your head to inspect areas below the ear and around the chin that are harder to judge in a straight-on view.
If your foundation differs greatly from your neck color, contour alone is unlikely to resolve that mismatch. Reconsider the base shade and its coverage area first. Powder can transfer onto collars and scarves, so avoid building up more than you need where clothing will touch. Before leaving, check the face-to-neck transition in good light and lightly tidy unnecessary color with a clean tool. Jaw contour is optional. If a little depth at the outer cheek gives the effect you like, there is no need to fill every possible contour zone equally.
Work Lightly Around the Hairline
A small amount remaining in the brush can connect color around the temples and skin near the hairline. Avoid drawing a dense stripe immediately below where the hair begins. Tied-back and loose hairstyles expose different areas, so arranging your hair first helps you decide what is actually visible. Think of this as adjusting the color balance around the outside of the face, not following a requirement to hide a broad forehead. You can leave areas untouched when the makeup already looks balanced to you.
Too much powder on fine hairs can make the boundary look messy because the color sits on hair rather than skin. Start with what remains after your cheek or jaw work instead of loading a large new amount, and inspect the roots in the mirror. Dedicated hairline-filling products and face contour powders are intended for different tasks, so do not assume identical results. Around the curved forehead and temples, the entire brush face may not touch at once. Adjust your wrist gently or turn your face to improve visibility rather than rubbing repeatedly from an awkward angle.
Use a Smaller Tool for Smaller Areas
The 721’s width is useful over broad cheek and jaw areas, but can make narrow shadows beside the nose harder to control. You can change the angle to work with a smaller part of the head, yet must still watch whether the rest touches the eye or cheek area. If you are building a simple tool collection, choosing by the areas you use most is easier than expecting one large brush to manage every facial detail. Someone who mainly wants precise nose contour may find a smaller brush the more relevant first purchase.
More tools do not automatically mean better makeup. If a soft face brush you already own spreads powder thinly and gives you control over the desired area, it may overlap with the 721’s job. A reason to choose this model is that its angled surface and head size suit your movements. Those who mainly use cream contour, or prefer placing a very sharply defined initial shape, should compare other brush forms. Base your choice on contact area, product texture and your usual routine rather than the category name printed on the handle.
Switching to Blush or Highlighter
The brand also presents blush and highlighter as uses for the 721. Its angled surface can spread a light layer of powder blush over a broad cheek area, but dipping it into a bright color immediately after contour risks mixing pigments. Check for residual dark powder and use a properly clean tool when changing colors. One wipe on a tissue does not necessarily remove everything held inside the bristles. If you frequently alternate clearly different products, separate brushes may save more time than correcting muddy color each time.
For highlighter, suitability depends on whether you want a broad glow or a small, precise accent. The 721 can be used to diffuse a light sheen over the cheek, while its head may feel large for a narrow cheekbone point or the inner corner of an eye. Start with a very small amount on the tips and test the intended area. After using a shimmery product, clean appropriately so that sparkle does not carry into the next contour application. Multiple possible uses do not mean switching between products repeatedly without cleaning.
Correct a Stripe or Patch in the Right Order
If the first deposit looks too dark, stop adding powder. Try gently softening only its edges with a clean face brush. If necessary, a puff carrying very little remaining base can lightly press over the boundary to reduce its appearance. Adding a large new amount of foundation may change thickness and texture, so adjust a small area first. Your correction tool should be clean, too. Instead of rubbing continuously at the skin, pause and assess the entire face; an unnecessary correction can easily spread beyond the original problem.
When powder sticks in isolated patches, inspect the base before deciding the brush is at fault. Areas that are still moist, heavily powdered or dry and flaky can respond differently to the same movement. Check whether old product has accumulated inside the bristles as well. Next time, change one factor at a time: let the base settle, reduce the powder, then adjust pressure. Changing quantity, placement and pressure simultaneously makes it harder to know what helped. Start by examining the darkest first-contact point and build your practice from that observation.
Judge the Result in Useful Light
Strong yellow lighting can make contour appear warmer, while light falling from one side can make an existing shadow look deeper. Trying to match both sides to the same darkness under uneven lighting may lead you to apply unequal amounts of product. Where possible, establish the basic strength under light that reaches both sides of the face, then check in daylight or a neutral light before going out. You do not need harsh direct sunlight. Simply recognize that both the direction and color of illumination affect what you see.
A phone photograph can help, but automatic exposure and beauty filters may change contrast and color. For a useful before-and-after comparison, keep the location and distance similar and avoid strong processing. If contour appears weak in a photo, that does not automatically mean more is needed on the actual face. Makeup seen during close conversation and makeup intended for photography can call for different intensities. The 721 helps you control powder toward your preferred result; it cannot guarantee that the result will look identical under every light or camera setting.
Clean Without Straining the Bristles and Joint
After use, lightly remove loose powder on a soft tissue. Wash according to how dirty the brush is, using a brush cleanser suitable for natural hair and prioritizing any care instructions supplied with the product. Wet the bristle area with lukewarm water without leaving the ferrule and wooden handle submerged. Work gently against your palm rather than twisting the hair or scrubbing it hard against a rough surface. Rinse thoroughly until the water runs clear, then press out moisture with a towel. Natural bristles do not guarantee that every person’s skin will find a brush comfortable.
Gently restore the angled shape and let the brush dry flat in a ventilated place. Avoid storing it upright with wet bristles pointing upward or sealing it inside a pouch immediately after washing. Do not speed drying with a hot hairdryer or strong direct sunlight. Check that the area near the bristle roots is dry before putting it away. Stop using the brush if it feels irritating, and do not rub it over injured skin. Keeping it as a personal tool makes its use and cleaning history easier to manage than sharing it among several people.
Storage and a Clear Buying Decision
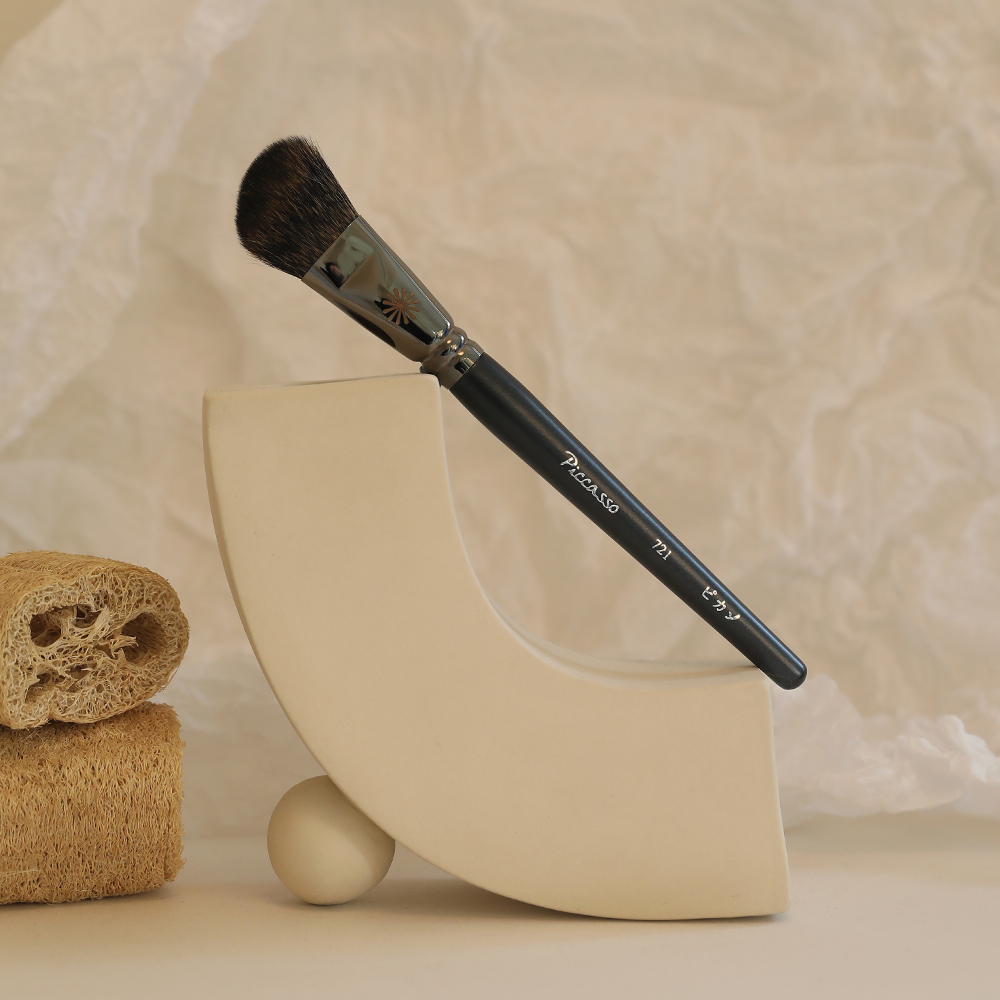
Store the brush with enough room that its angled head is not bent against a drawer wall or other tools. A protective cover is not a drying enclosure for a wet brush. Once it is fully dry, check that the cover and pouch fit its 20.4 cm length comfortably. That length can be awkward in a small travel pouch, so consider whether your priority is a dressing-table brush or a compact travel tool. Props, display stands and other products shown in photographs are not automatically included in the purchase; check the actual package contents.
The 721 is a sensible candidate for someone who wants to build light powder contour on the cheeks and jaw using a rounded angled surface. A person who wants only synthetic bristles, or primarily needs a tiny nose contour, may be better served by another tool. When shopping in Korea, match the 721 model number, materials and selected option, and do not treat an overseas dollar price as a fixed Korean shop price. Start by learning the quantity and pressure for one cheek area, then extend the method to the jaw or hairline. Adapting the tool to your own movements matters more than attempting every use on the first day.
Reviews 1
Contouring and price
Quite good as a shading brush, but a bit pricey
ch*****
A little closer to Korea.
Thank you for reading.